> For the complete documentation index, see [llms.txt](https://help.littledata.io/llms.txt). Markdown versions of documentation pages are available by appending `.md` to page URLs; this page is available as [Markdown](https://help.littledata.io/event-editor/custom-data-sources.md).
# Enrich events with outside data
Bring additional data from Shopify metafields and the storefront into your Littledata events with Custom Data Sources.
Some of the data you want to act on never reaches the standard events (e.g. loyalty tier, product margin). Custom Data Sources lets you pull additional data for use in the Event Editor.
### What you can do with it
* **Send an attribute your destination wants but Shopify doesn't emit.** Loyalty apps store the customer's tier in a customer metafield. Expose it and send `loyalty_tier` to Klaviyo or GA4.
* **Gate or derive an event on outside data.** Once a metafield is exposed, a [trigger condition](/event-editor/trigger-conditions.md) can fire an event only for VIP customers, or a [custom event](/event-editor/custom-events.md) can spin off a VIP-only conversion.
* **Add product economics to your events.** Expose product or variant metafields for margin, cost, or material, and map them into the destination.
* **Personalize flows with product attributes.** Send material, sizing, or any custom attribute so email and SMS flows can reference it.
### What you can pull in
| Source | Example | Status |
| ---------------------------------------- | ----------------------------------------- | ----------- |
| Customer metafields | Loyalty tier set by a loyalty app | Available |
| Product metafields | Material, margin, or any custom attribute | Available |
| Product variant metafields | Variant-level cost or sizing data | Available |
| Order metafields | Custom order attributes | Coming soon |
| Storefront data (cookies, local storage) | Values set by your theme or other scripts | Coming soon |
### Set up Custom Data Sources
{% stepper %}
{% step %}
#### Enable the source
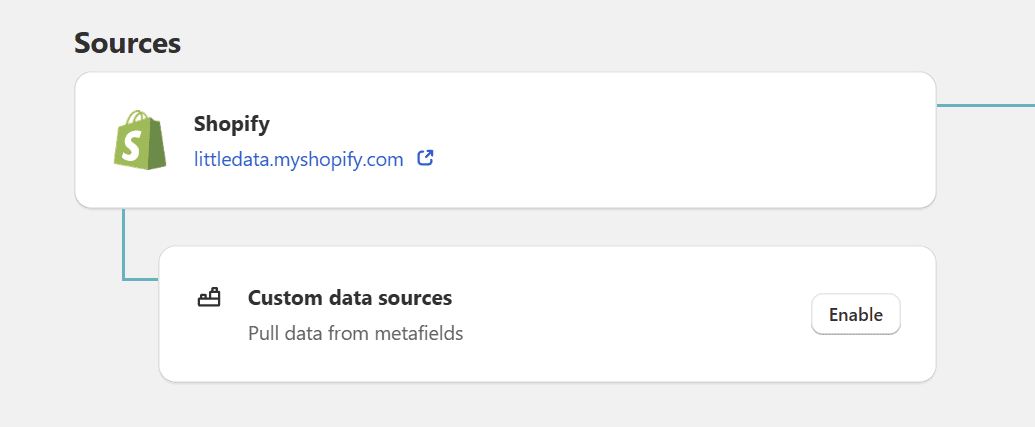
In your Littledata dashboard, find **Custom data sources** under **Sources** and click **Enable**.
{% endstep %}
{% step %}
#### Open the Metafields configuration
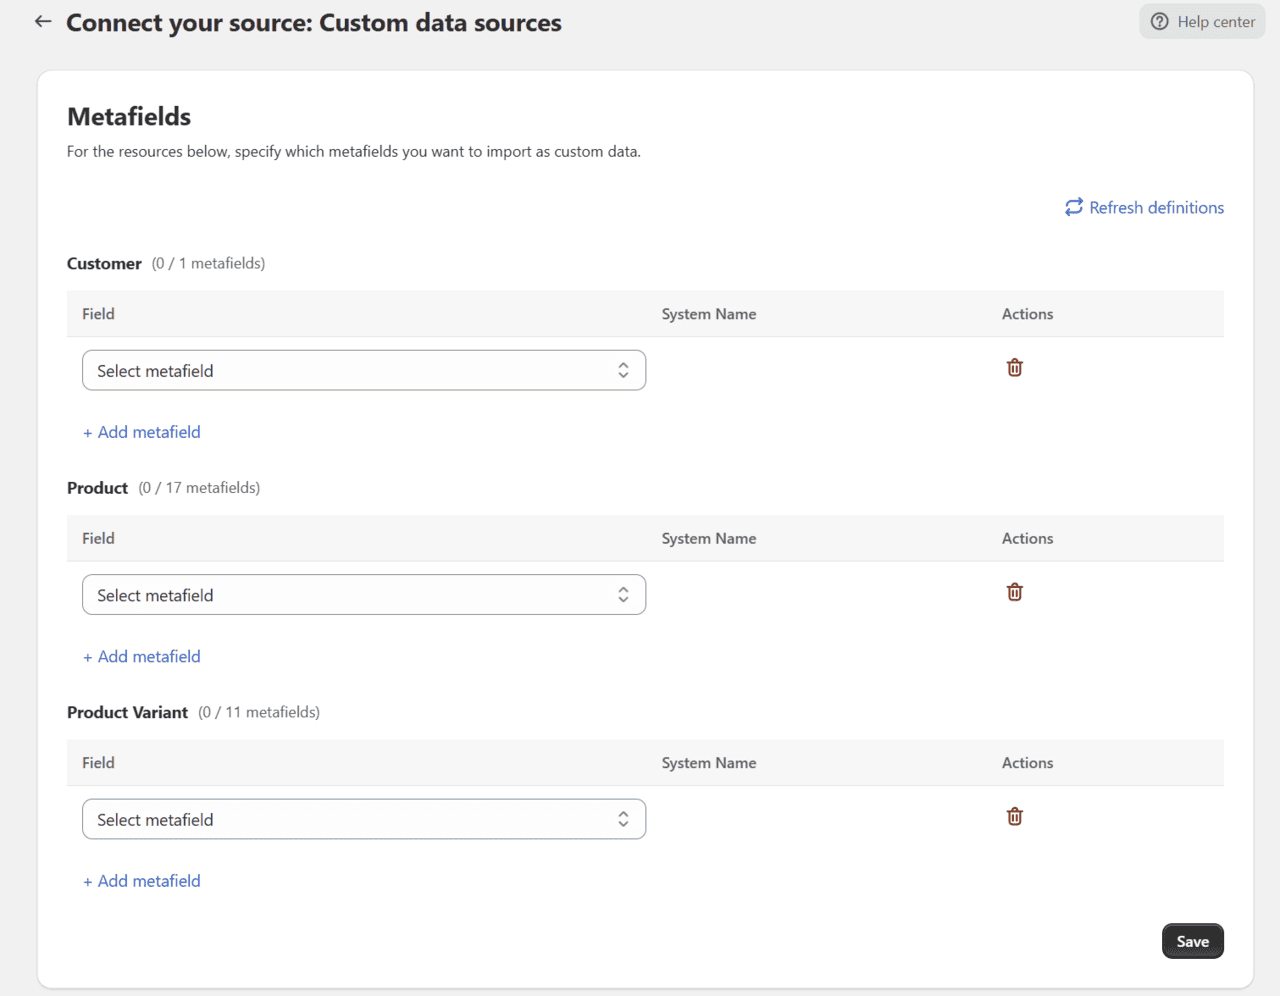
You'll see a section for each metafield type: **Customer**, **Product**, and **Product Variant**.
{% endstep %}
{% step %}
#### Select the metafields to expose
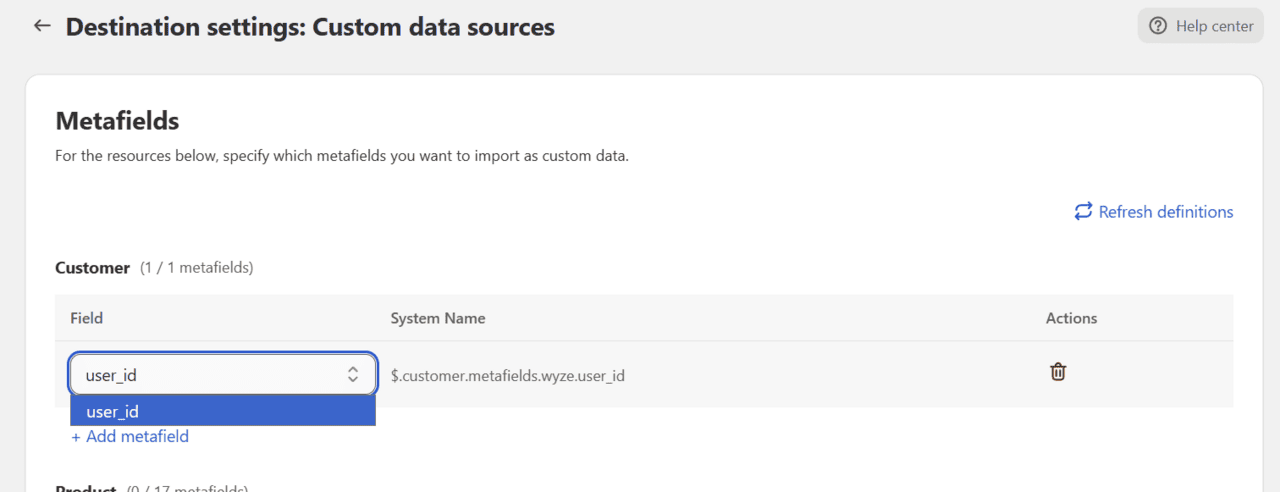
In the section for your metafield type, click **Add metafield** and pick the field from the dropdown. In this example we're exposing a customer metafield, `user_id`, and the **System Name** column shows the exact path it gets: `$.customer.metafields.wyze.user_id`.
If your metafield isn't in the dropdown, click **Refresh metafields** and give it a few minutes to discover the store's metafields.
{% endstep %}
{% step %}
#### Save
Click **Save**. Only the metafields you've selected here become available in the Event Editor.
{% endstep %}
{% endstepper %}
### Use your metafields in the Event Editor
Once exposed, your metafields behave like any other field: map them to destination properties, or use them in [trigger conditions](/event-editor/trigger-conditions.md).
{% stepper %}
{% step %}
#### Open an event
Go to the destination's Event Editor and [open the event](/event-editor/edit-an-event.md) you want to enrich.
{% endstep %}
{% step %}
#### Open the source dropdown
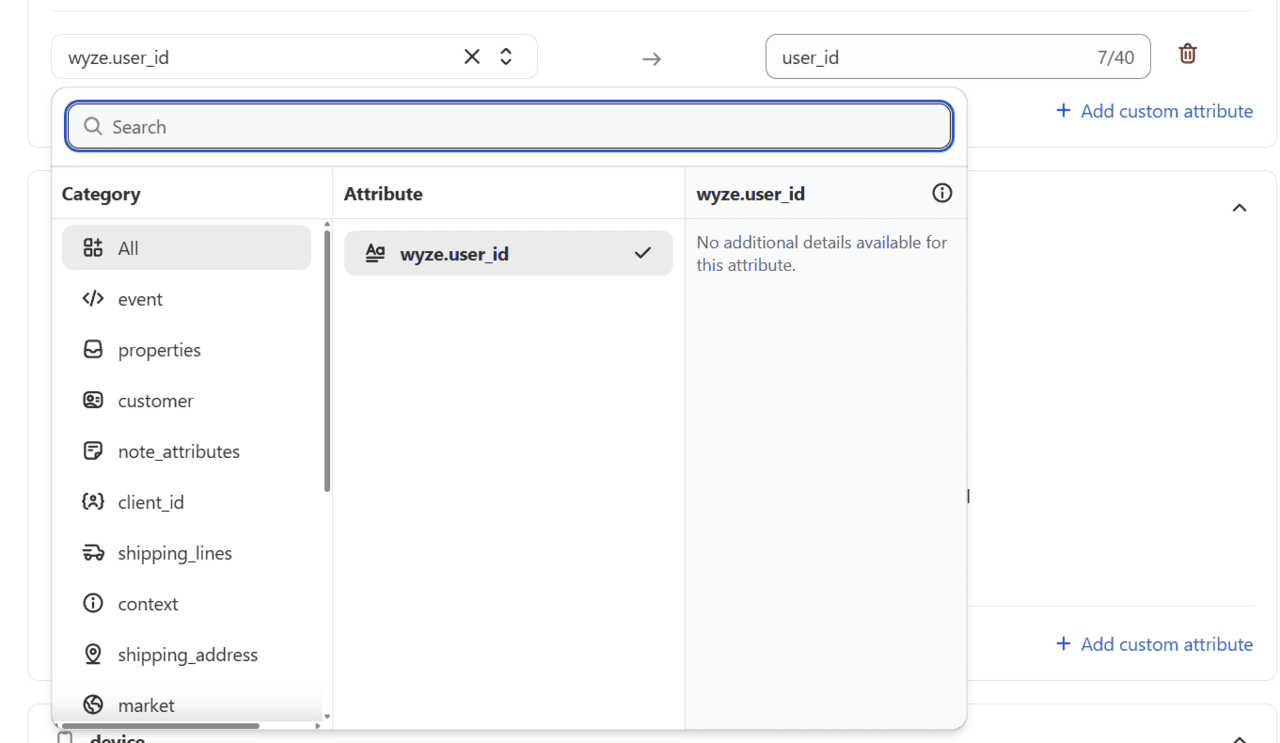
In the [field mappings](/event-editor/field-mappings.md), open the dropdown on the property you want to map, or add a new custom parameter.
{% endstep %}
{% step %}
#### Pick your metafield
Your metafield appears under its designated category. Ours is a customer metafield, so it's listed under **customer**, and you can search for it by name.
{% endstep %}
{% step %}
#### Save
Save your changes and check the [event preview](/event-editor/event-preview.md) to see the metafield in the payload.
{% endstep %}
{% endstepper %}
### Related articles
* [Remap existing events](https://help.littledata.io/event-editor/field-mappings)
* [Filter events with trigger conditions](https://help.littledata.io/event-editor/trigger-conditions)
* [Create a VIP purchase event](https://help.littledata.io/event-editor/common-setups/vip-loyalty-purchases-meta-ads)