> For the complete documentation index, see [llms.txt](https://help.littledata.io/llms.txt). Markdown versions of documentation pages are available by appending `.md` to page URLs; this page is available as [Markdown](https://help.littledata.io/event-editor/custom-events.md).
# Derive a new custom event
Spin a meaningful slice of an existing standard event into its own named event without touching the original.
Your Shopify store already fires events like `purchase` and `checkout`. Sometimes a slice of one of those events matters on its own: high-value orders, first-time subscribers, wholesale.
A custom event lets you give that slice its own name and send it as an extra event, while the original keeps flowing untouched.
### What you can do with it
Reach for a custom event whenever you want a named event for one specific scenario:
* **Name a conversion your destination expects.** Ad platforms and email tools often want a specific event name for a conversion or flow trigger. Derive a `qualified_lead` from a checkout event so Meta gets exactly the name it looks for.
* **Give a segment its own event** such as high-value orders, wholesale, first-time subscriptions. Derive a `vip_purchase` from `purchase` that only fires above an order total, so that slice reports and optimizes on its own.
* **Create a dedicated conversion to optimize ads against.** An event that fires only for the customers you want more of gives Meta or Google Ads a precise signal to bid toward, instead of treating every purchase the same.
* **Send a variant with different data.** Custom events carry their own [field mappings](/event-editor/field-mappings.md), so you can send a reshaped version to a destination without touching the original.
### How custom events work
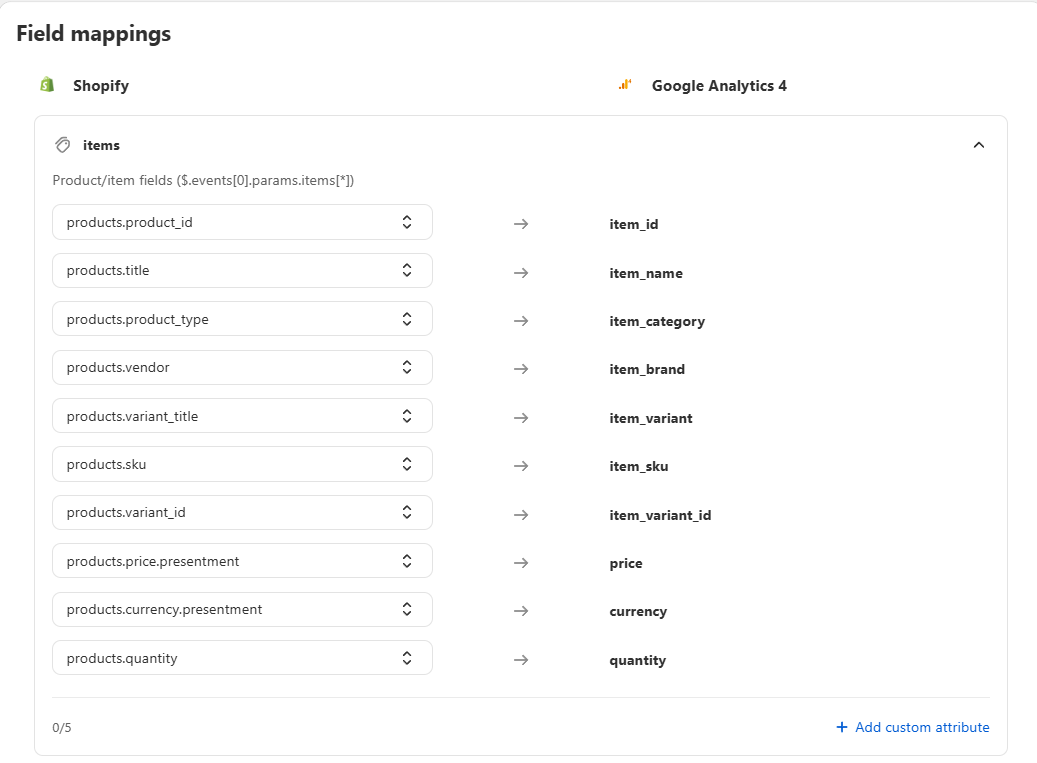
Every custom event is built on a base event, and the base event determines everything at the start: when your custom event fires and what data it carries. You don't build the payload from scratch. The moment it's created, your custom event inherits the complete field mappings of its base, so it's already sending a full, valid payload to your destination.
From there you shape it into what you need: rename it, narrow when it fires with trigger conditions, and change any mapping. A typical custom conversion looks like this: base it on `purchase`, add a condition so it only fires for first-time subscribers, and Meta gets a dedicated `NewSubscriber` conversion to optimize against, while the standard `purchase` event keeps flowing untouched.
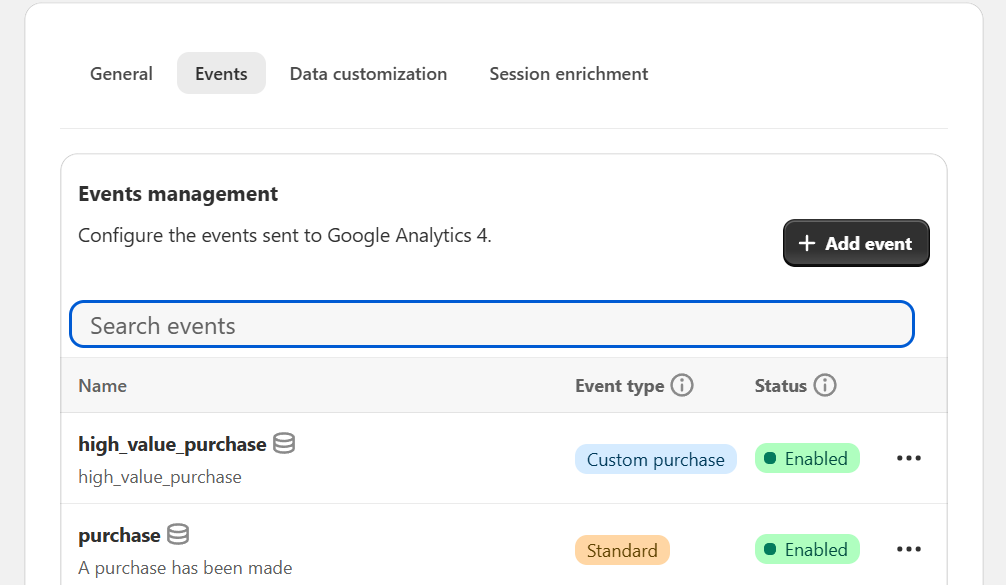
Once created, the custom event appears in the events list and behaves like any other event: you can edit, enable, disable, or delete it.
{% hint style="warning" %}
If Shopify Markets is enabled in Littledata, custom events are not market-specific. A custom event you create in one market is created for every market. To limit it to a single market, add [trigger conditions](/event-editor/trigger-conditions.md) on the market fields (`market_id` or handle, listed in the [Tracking schema glossary](/event-editor/glossary.md#market)) so the event only fires for the market you want.
{% endhint %}
{% stepper %}
{% step %}
#### Create a custom event
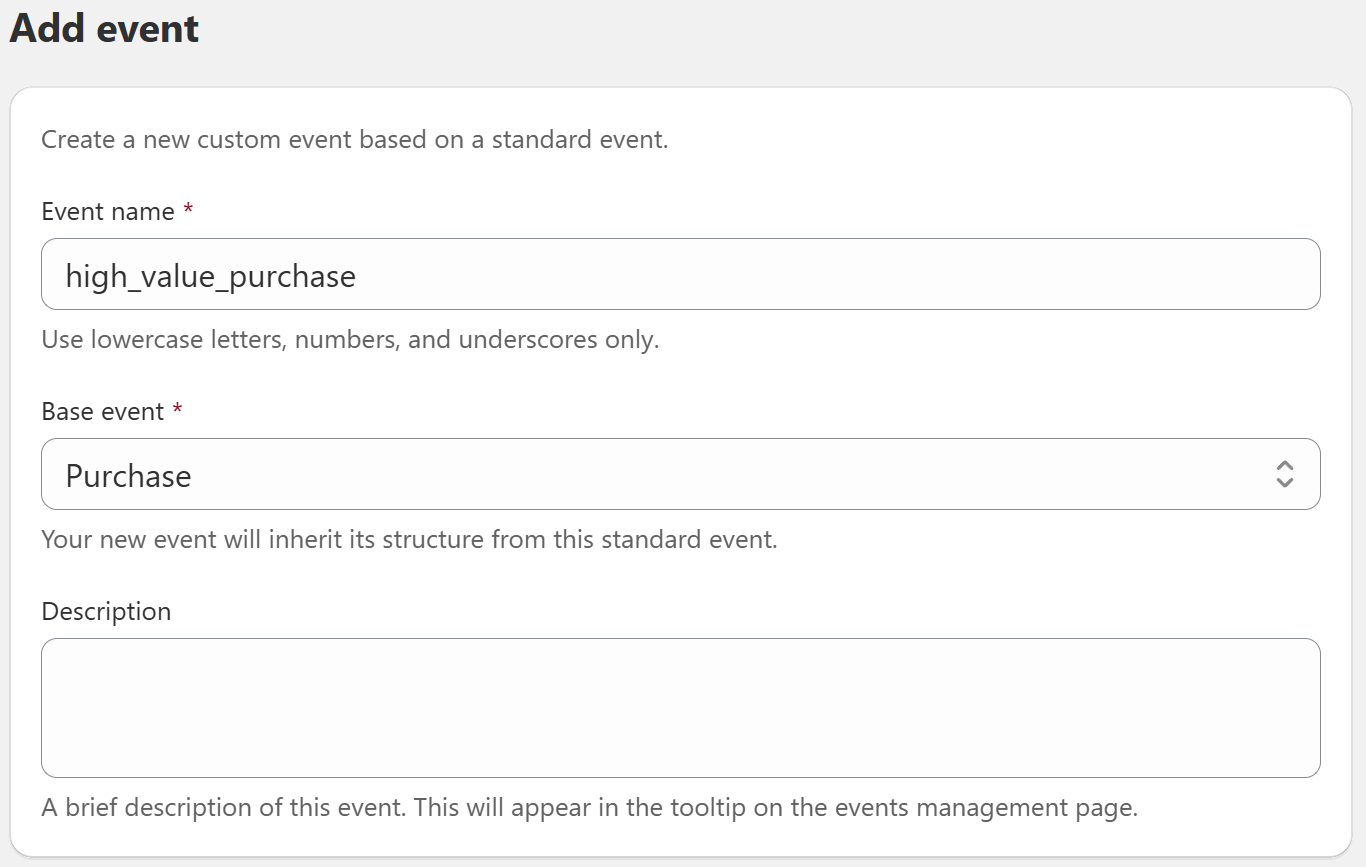
In the destination's [Event Editor](/event-editor/getting-started.md), click **Add event**.
{% endstep %}
{% step %}
#### Name it and pick a base event
The base event determines when your custom event fires and which mappings it starts with. In this example, `high_value_purchase` fires whenever a `purchase` event fires.
{% endstep %}
{% step %}
#### Add a description
Optional, but recommended. A short note on why the event exists makes your setup much easier to maintain later.
{% endstep %}
{% step %}
#### Scope it with trigger conditions
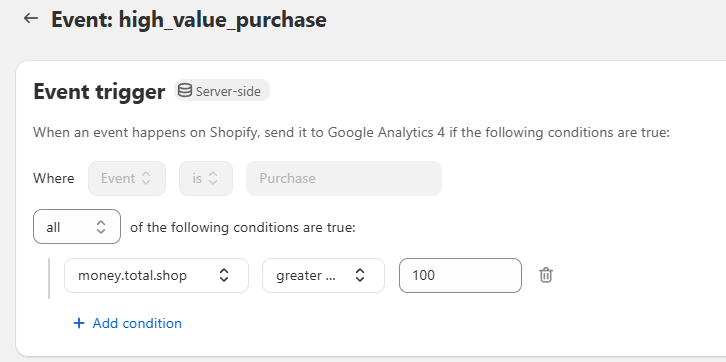
Without trigger conditions, every purchase now sends two events to this destination: `purchase` plus `high_value_purchase`. Add [trigger conditions](/event-editor/trigger-conditions.md) in the event editor so your custom event only fires in the scenarios you care about, for example only when the event `total` is over a threshold.
{% endstep %}
{% step %}
#### Adjust the mappings
Your custom event inherits every field mapping from its base event, so it works without any changes. Edit them if the variation needs different data: change a source field or add custom parameters. Use the [event preview](/event-editor/event-preview.md) to check the payload.
{% endstep %}
{% step %}
#### Save
{% endstep %}
{% step %}
#### Check the event in the list
Your custom event now appears in the events list. Use its **three-dot menu** to enable, disable, edit, or delete it.
{% endstep %}
{% endstepper %}
### Related articles
* [Filter events with trigger conditions](https://help.littledata.io/event-editor/trigger-conditions)
* [Remap existing events](https://help.littledata.io/event-editor/field-mappings)
* [Preview events](https://help.littledata.io/event-editor/event-preview)
.png?alt=media)
.png?alt=media)