> For the complete documentation index, see [llms.txt](https://help.littledata.io/llms.txt). Markdown versions of documentation pages are available by appending `.md` to page URLs; this page is available as [Markdown](https://help.littledata.io/event-editor/getting-started.md).
# Getting started
Create your first customization with the Event Editor.
This guide will help you build your first customization end-to-end: a custom event that gives your best-selling product its own conversion in Meta.
{% hint style="info" %}
Want something working sooner? A [recipe](/event-editor/recipes.md) adds a ready-made event to a destination in one click, and you can customize it afterwards.
{% endhint %}
### What you'll build
A custom event based on **Purchase**, scoped with a trigger condition so it only fires when the order contains your best-selling product. Sent to Meta as its own event, it gives the algorithm a dedicated conversion to optimize toward, instead of lumping your winning product in with every other purchase.
### What you need
* Your best-selling product, and its exact title or SKU as it appears in Shopify
* [Meta Conversions API](/integrations/facebook-capi.md) connected as a Littledata destination
* Access to the Event Editor in the Littledata app
### Steps
{% stepper %}
{% step %}
#### Open Littledata
Open the Littledata app from your Shopify admin.
{% endstep %}
{% step %}
#### Open the Meta destination's Event Editor
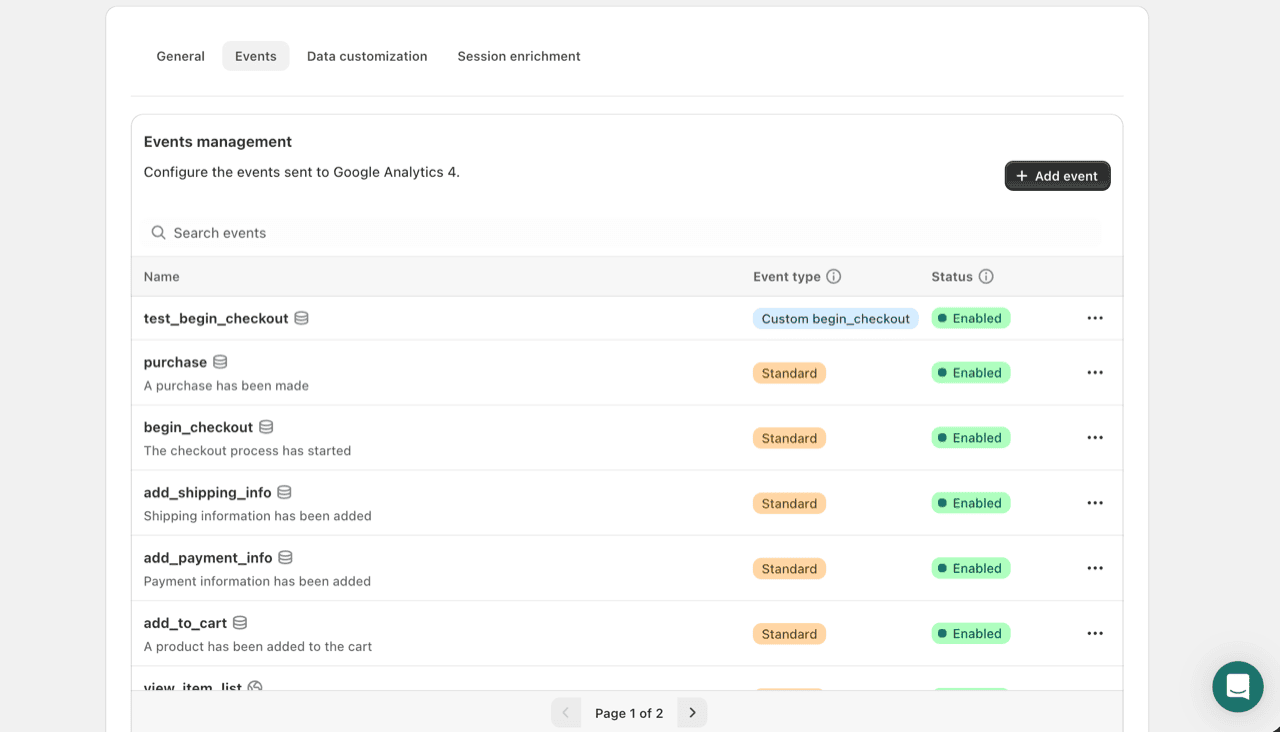
Go to **Settings** for your Meta Conversions API destination, then open the **Event Editor**. This lists every event Littledata sends to Meta, standard and custom side by side.
{% endstep %}
{% step %}
#### Add a custom event
Click **Add event**.
Name the event after the product, for example `bestseller_purchase`.
Select **Purchase** as the base event. The custom event inherits the complete field mappings of its base, so it sends a full, valid payload from the start. See [Derive a new custom event](/event-editor/custom-events.md).
{% endstep %}
{% step %}
#### Scope it to your product
Without a condition, the new event fires on every purchase. Add a trigger condition so it only fires when the order contains your best-selling product. Some possible options below:
Field
Operation
Value
products.title
contains
<your product name>
products.collections
contains
skincare
products.category
does not equal
Health
products.product_type
does not equal
Health
products.handle
equals
product-handle
See [trigger conditions](/event-editor/trigger-conditions.md) for more info.
{% endstep %}
{% step %}
#### Preview and save
Use the event preview to check the payload, then click **Save**.
{% endstep %}
{% step %}
#### Mark it as a conversion in Meta
In Meta Events Manager, mark `bestseller_purchase` as a custom conversion. Then choose it, not the general Purchase event, as the optimization event for campaigns you want focused on that product, for example a launch push or a margin-protecting promotion.
{% endstep %}
{% endstepper %}
### Verifying it's working
{% stepper %}
{% step %}
#### Place a test order
Place a test order containing your best-selling product.
{% endstep %}
{% step %}
#### Confirm the custom event
Confirm `BestsellerPurchase` arrives alongside the standard `Purchase` event in Meta **Events Manager**.
{% endstep %}
{% step %}
#### Test an order without the product
Confirm orders without that product fire `Purchase` only.
{% endstep %}
{% endstepper %}
### Where to go from here
Aside from creating a [custom event](/event-editor/custom-events.md), you can also:
* [Enrich events with outside data](/event-editor/custom-data-sources.md): pull in values from Shopify metafields, like a loyalty tier or product attribute
* [Remap existing events](/event-editor/field-mappings.md): change what field a destination reads a value from
* [Enable or disable events](/event-editor/enable-disable-events.md): turn an event on or off per destination
For ready-made events you can add in one click, see [Recipes](/event-editor/recipes.md). For more worked examples, browse [Common setups](/event-editor/common-setups.md).