Littledata Pixel
Ensure seamless and accurate data collection across your Shopify store and across headless storefronts with the Littledata Pixel.
Installed as a custom web pixel directly from your Shopify admin, this powerful solution works alongside Littledata's server-side tracking to fill gaps and improve reliability - so you never miss a critical conversion or customer journey.
Key Benefits
- Shopify Hydrogen and headless support – Get consistent tracking across a headless storefront
- Fully redundant tracking – Safeguard your marketing data with both client-side and server-side tracking for key destinations
- Custom landing page support – Track customers across non-Shopify pages with ease
- Accelerated checkout compatibility – Track conversions seamlessly across Shop Pay and other accelerated checkout options
How to add the Littledata Pixel
-
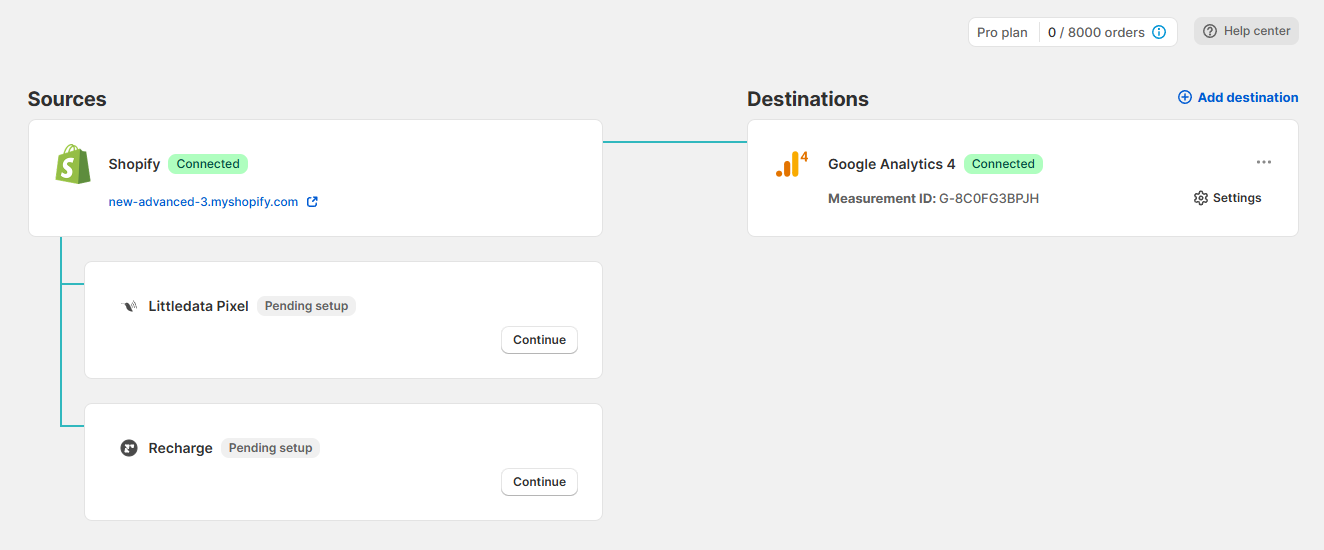
In the Littledata dashboard, you will see the Littledata Pixel widget.
-
Click Continue to enter the setup.
-
-
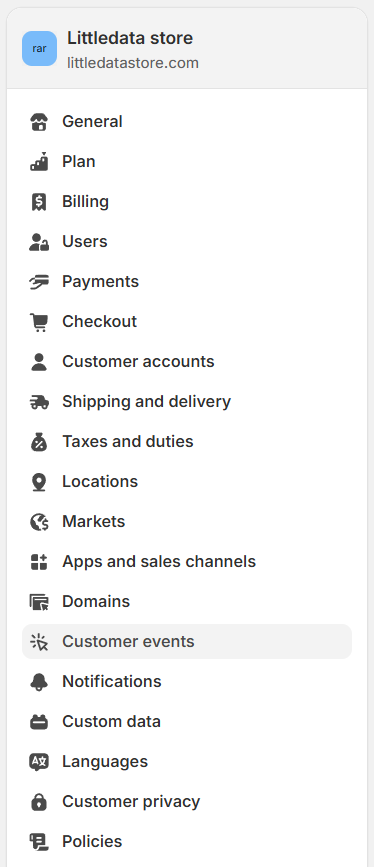
From your Shopify store admin, go to Settings, then Customer events
-
Click Add custom pixel
You will need to create a custom pixel called Littledata - Advanced Tracking
Make sure the name is correctly spelled so we can detect it on your store.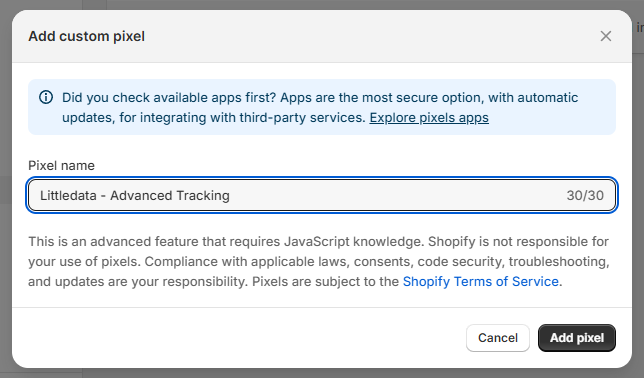
-
Configure the customer privacy settings.
Please select "Not required" and "Data collected does not qualify as sale" so that the Littledata pixel is able to load.
We manually handle consent according to the Customer Privacy API.For headless setups using cookie banners that are not automatically integrated with the Customer Privacy API, please refer to your cookie banner’s documentation on how to connect it manually.
If you’re on a custom storefront instead of Hydrogen, you’ll also need to include the Customer Privacy API asset. Learn more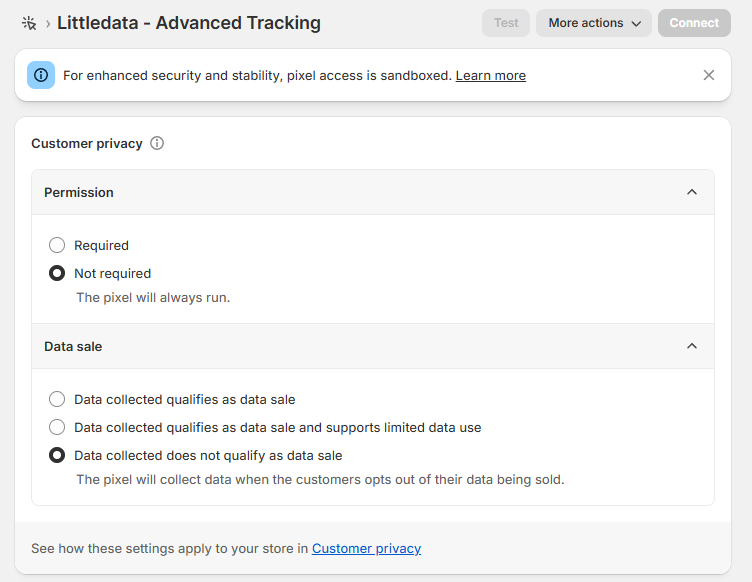
-
Please return to the Littledata app, copy the custom pixel code, and paste it into your newly created pixel under the Code section.
-
After that, click Save and then Connect.

Once the setup is complete, you will be redirected to the Littledata dashboard, where the Advanced tracking "Connected" state will indicate that the pixel has been detected on the store.
Redundant tracking setups
When added in addition to Littledata's server-side tracking, they allow for fully redundant tracking in destinations that support client and server-side events. Supported destinations include:
Adding the Littledata Pixel gives you another reliable way to track events that might otherwise be lost, and follows the best practice for a Redundant Setup.
What events are collected by the web pixel?
Littledata's custom web pixel improves tracking of checkout and post-purchase events across Social bundle integrations (Meta Conversions API or Mea CAPI for short, TikTok and Pinterest).
| Data destinations | Web pixel event | Meta event | Description |
|---|---|---|---|
| Meta CAPI, TikTok, Pinterest | product_added_to_cart | AddToCart | The addition of an item to a shopping cart |
| Meta CAPI, TikTok | checkout_started | InitiateCheckout * | The start of a checkout process |
| Meta CAPI, TikTok | payment_info_submited | AddPaymentInfo * | Customer payment info submitted |
| Meta CAPI, TikTok, Pinterest | checkout_completed | Purchase * | Completing the checkout / thank you page |
* An additional PageView will be sent with the event
Troubleshooting
Littledata Pixel states
We run periodic checks to ensure that both the tracking script (via the app embed) and the custom web pixel are detected on your store.
-
Connected
- This means that the pixel is detected on your store; no action required on your end.
-
Not detected
-
This means that our check failed to detect the pixel on your store.
-
Click "Fix now" and follow the setup process.
-
Make sure the pixel is correctly named "Littledata - Advanced Tracking".
How to check if the web pixel has loaded
Go to your newly created pixel — Littledata - Advanced tracking — in the Customer events tab and click on test to open the custom pixel on your website.
![]()
To view which events are loading, visit each page that you want to test the pixel for, and review the Pixel helper dialog to ensure that the event was successfully subscribed to and that the callback function was successful.
![]()
How to reconnect the pixel
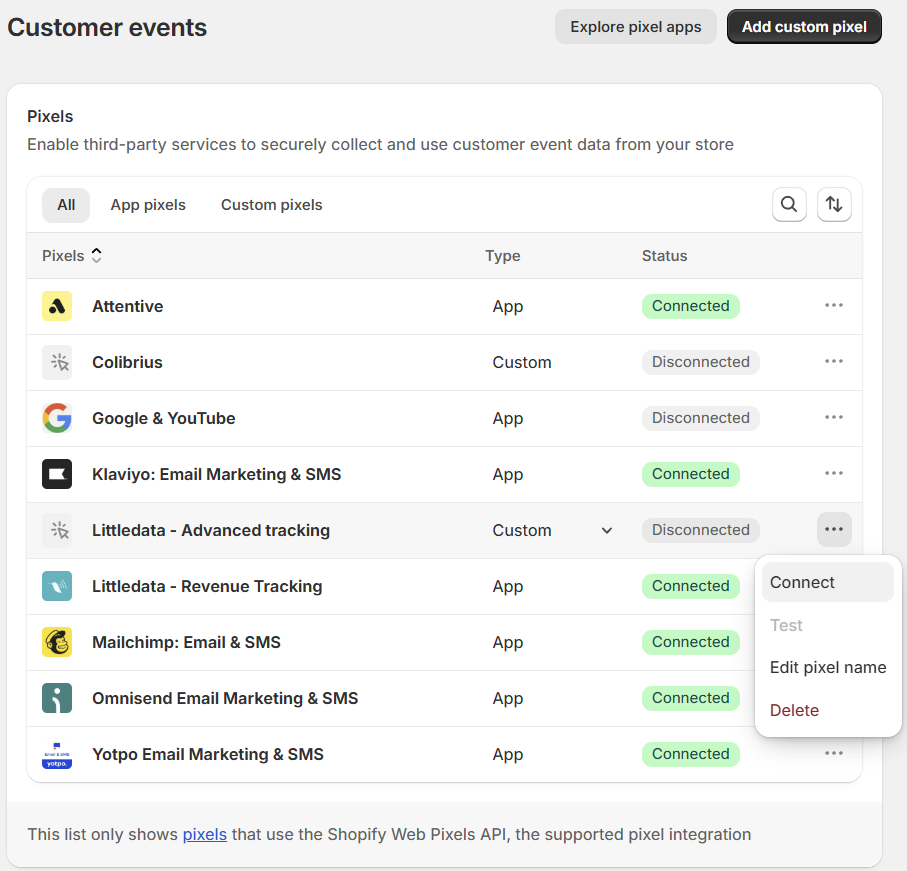
If you don't see the pixel firing, one of your colleagues may have disconnected the pixel. You need to go to your Shopify Customer events, check for the Littledata - Advanced Tracking, click on the three dots on the right, and click Connect. That's it!
