Tracking Shopify checkout steps in Google Analytics
Tracked checkouts
One of the biggest features of Enhanced Ecommerce tracking is support for checkout steps - the navigation path which you expect your website users to follow after they initiate the checkout up to the purchase.
Littledata tracks the Shopify checkout automatically, to ensure you can use the GA4 checkout funnel report out of the box.
Littledata supports checkout funnel event tracking for:
- Shopify checkout (including Checkout Extensibility) *
- Accelerated checkouts (Shop Pay, Amazon etc)
* This includes the same events for both the one-page checkout rolled out in 2024 and the original three-step checkout.
The Shopify checkout also includes checkout apps handling subscriptions and upsells. i.e. The checkout steps are the same for these customer journeys, but the resulting order is differentiated.
Checkout steps
When the customer starts and progresses through the checkout on your ecommerce site, Littledata sends a Checkout Step event to Google Analytics for the following checkout steps:
- Step 1: Contact information
- Step 2: Shipping information
- Step 3: Payment method
- Purchase (Order complete)
Check out a detailed list of all events supported in Littledata's GTM and Google Analytics data layer.
Event names and triggers
The checkout journey starts when a user clicks the checkout button.
Let's take a closer look at the structure of these events, what we call them when they're triggered, and how they work.
| Step | GA4 Event Name | User action | Technical trigger |
|---|---|---|---|
| 1 | begin_checkout | Contact info section viewed | Checkout created in Shopify for that cart |
| 2 | add_shipping_info | Shipping info section viewed | Customer property added to checkout |
| 3 | add_payment_info | Payment section viewed | Shipping lines property addded to checkout |
| Purchase | purchase | Order completed | Order is created and marked as PAID |
Accelerated checkouts
Littledata works seamlessly with one-click checkouts (like Shop Pay), tracking the purchase and sending it over to the desired destination, as well as attributing it to the original source.
But these accelerated checkouts may lack Checkout Steps - because the nature of the one-click checkout is to bypass the Shopify checkout entirely.
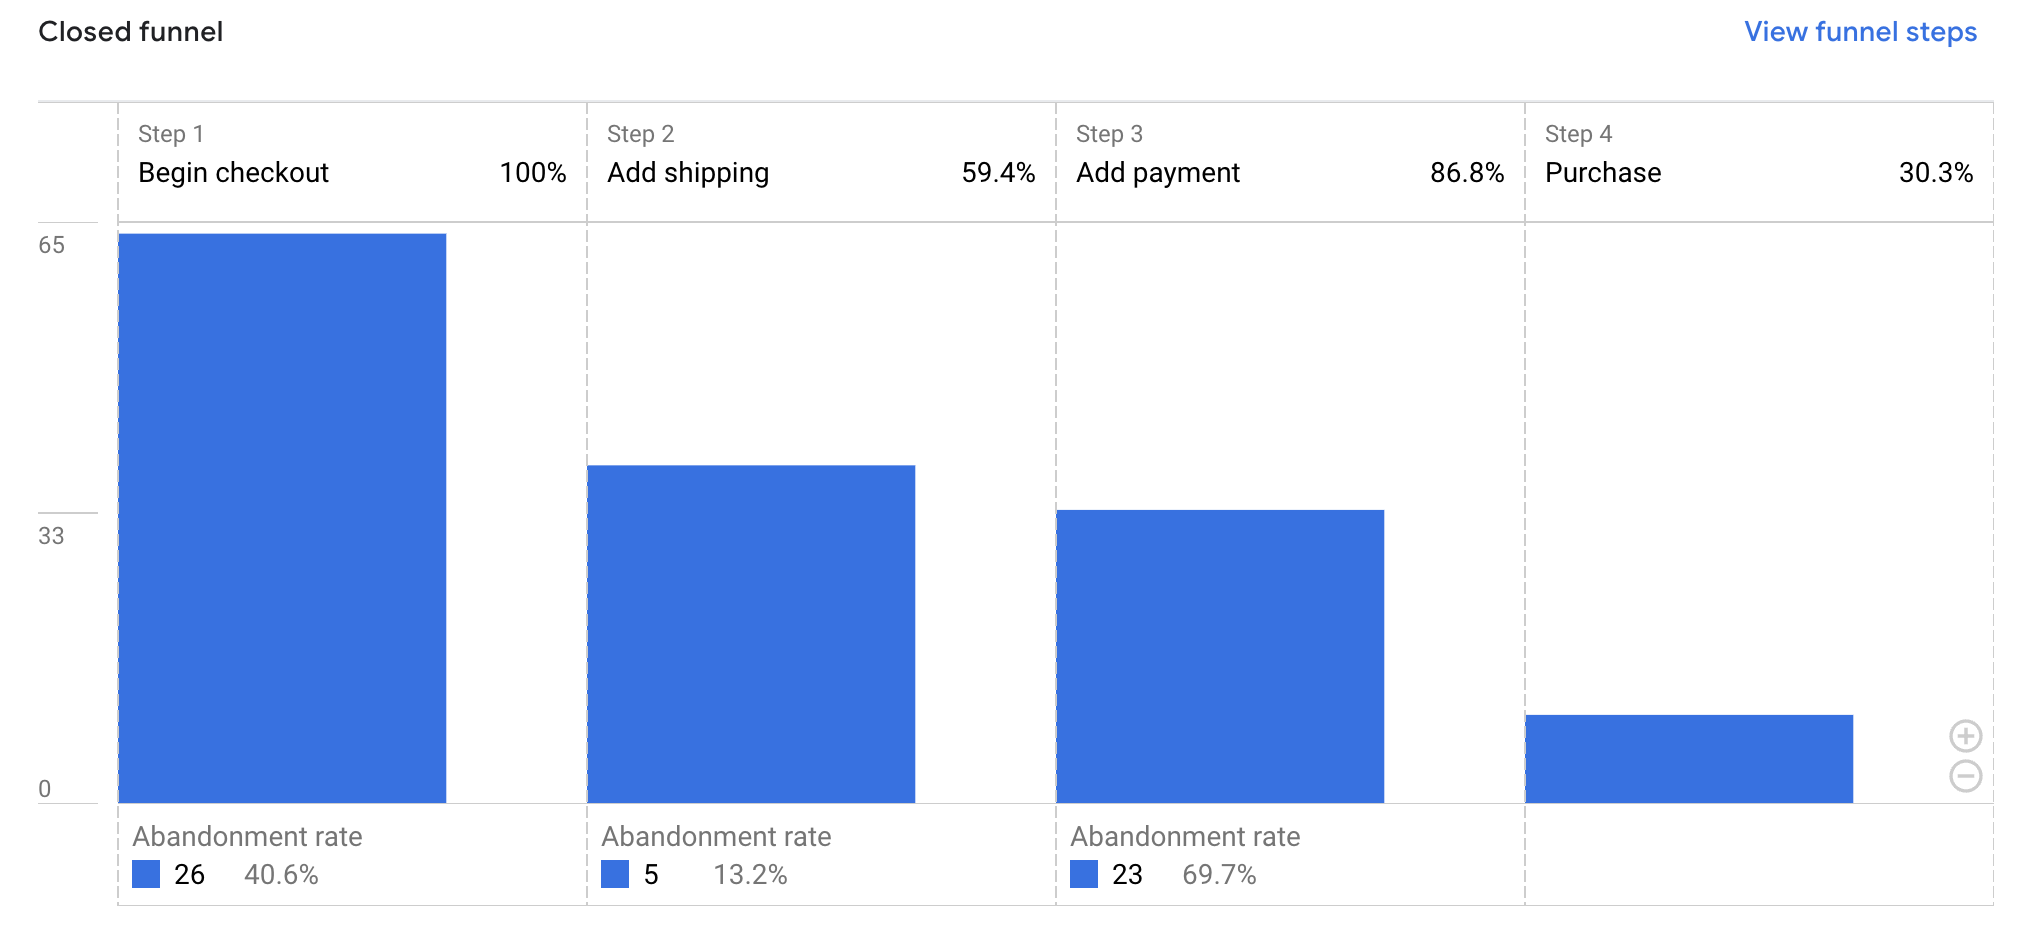
How the report looks in Google Analytics
After you install Littledata, you will start seeing data populating in your Checkout Journey report with the checkout steps like this:

How to customize your checkout funnel in GA4
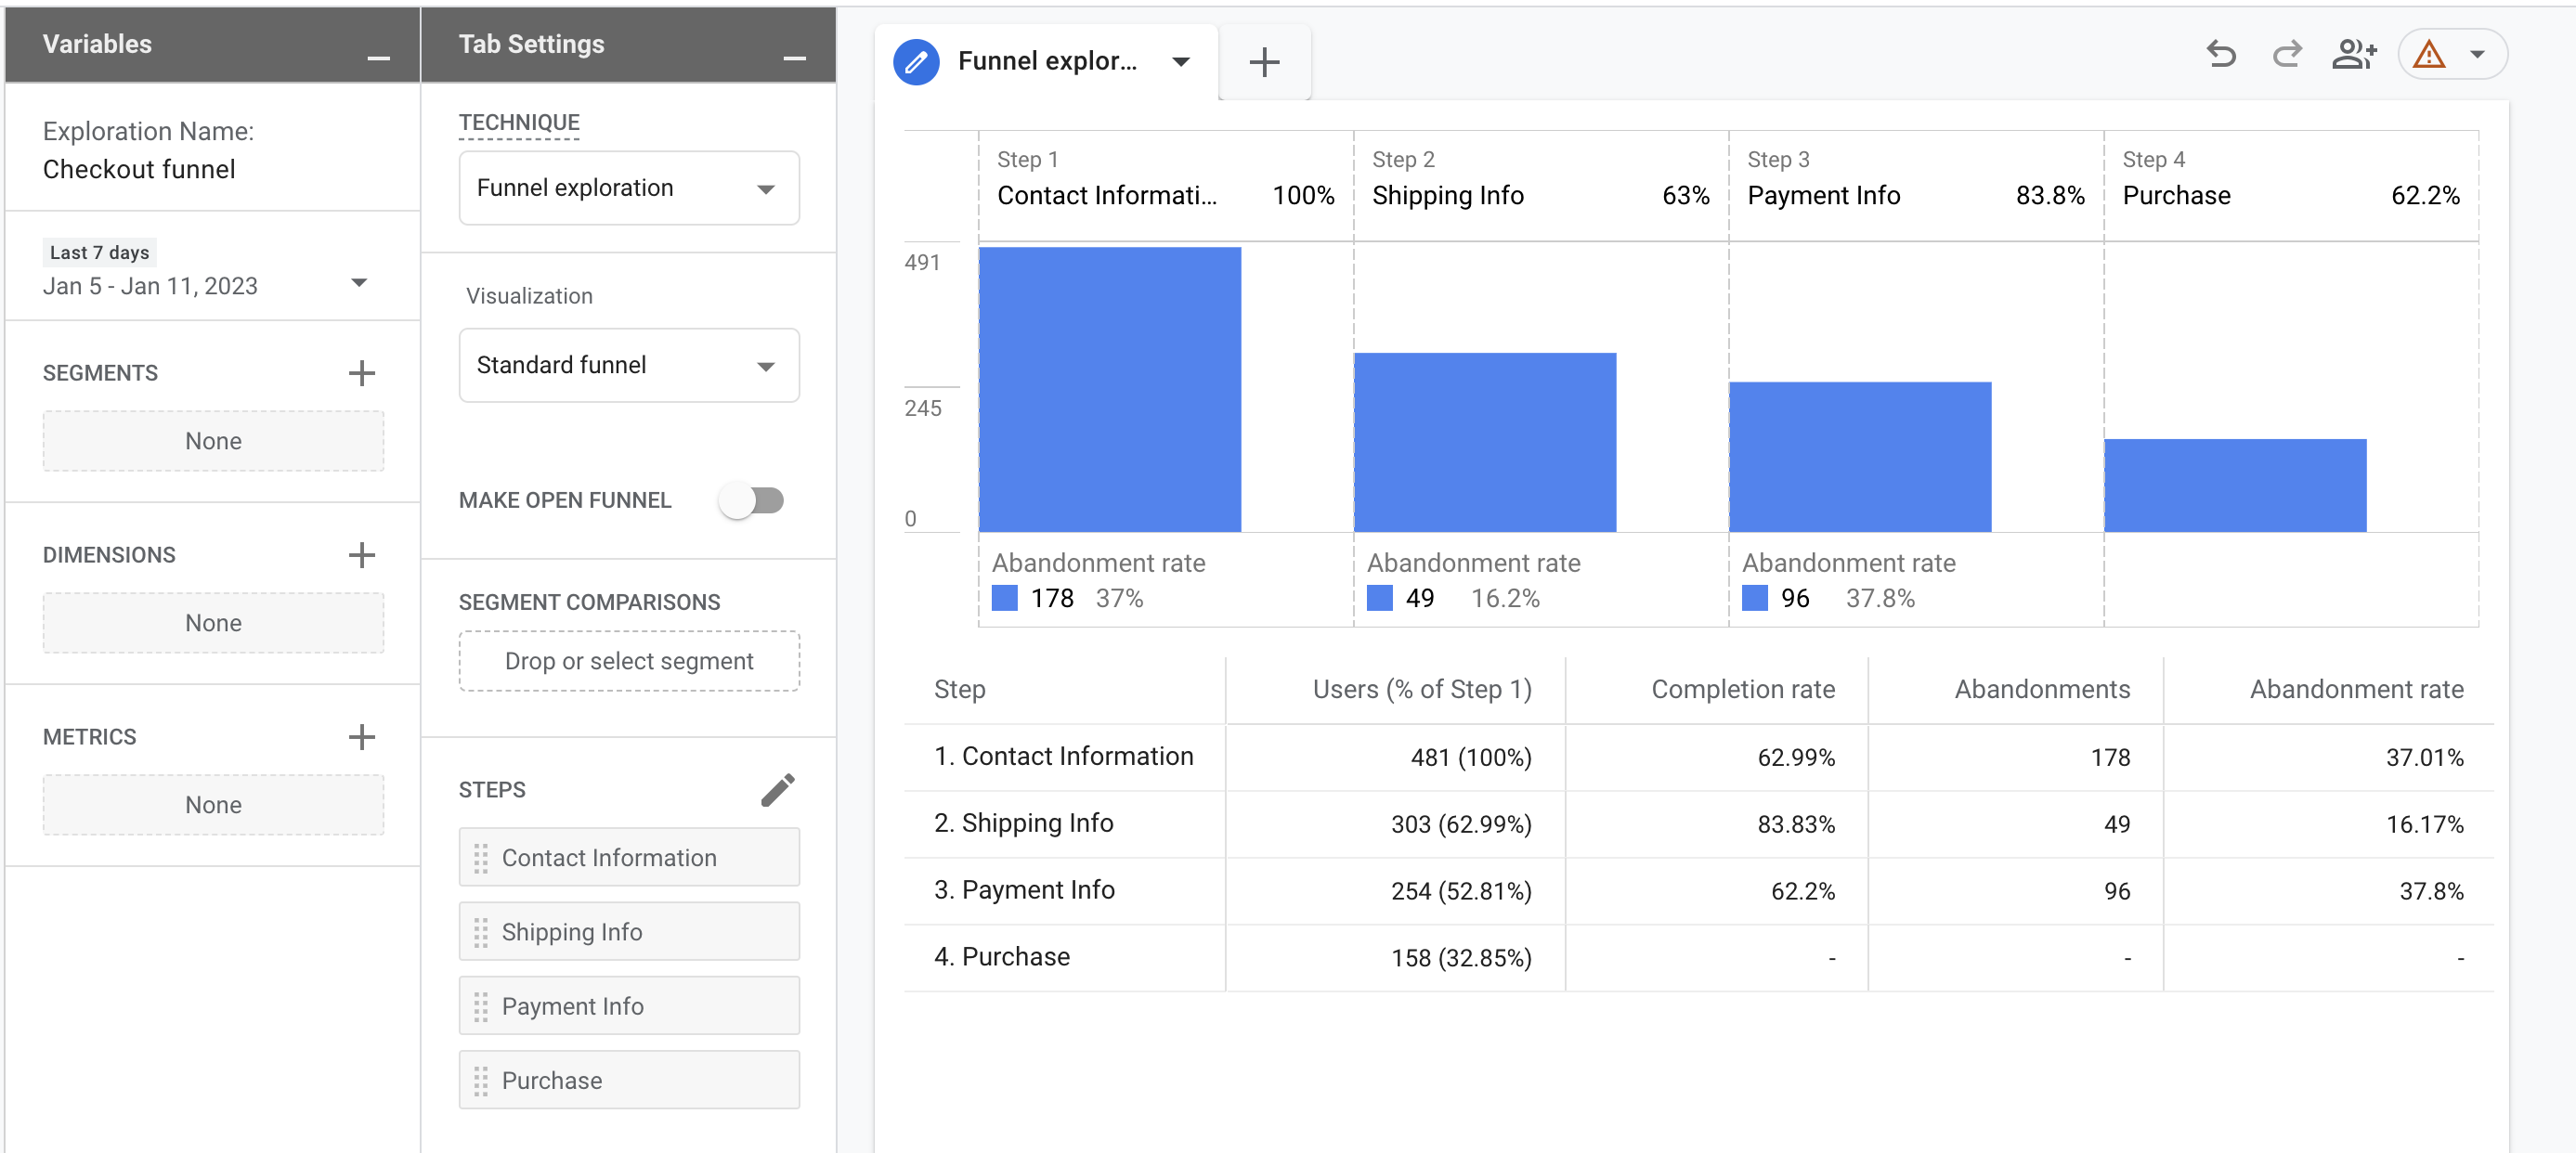
The Checkout Journey report is not editable, but you can easily rebuild it using the checkout events sent by Littledata in a Funnel Exploration report.
Here's how to build a checkout funnel in Google Analytics 4.
- Go to the Explore tab and start a new exploration. In the top left corner, under TECHNIQUE, select Funnel exploration and set a name for your report. You'll name this report Checkout funnel:

- Next, you will need to add the steps to your funnel. Go to the STEPS section and click the pencil icon to edit your funnel steps:
- Next, you will add the steps starting with Contact Information. Name your step, then search for the begin_checkout event:

- Click on Add step and repeat the process with the add_shipping_info event:

- Repeat the same process and select the add_payment_info event for the Payment step:

- Lastly, add your purchase step; search for purchase and select the event:

- You now have a complete checkout funnel that showcases data collected during the checkout and the drop from each checkout step:
