Littledata to Google Analytics installation guide
This guide is for the Littledata - Customer Tracking app. For the free Google Analytics app, please refer to this article.
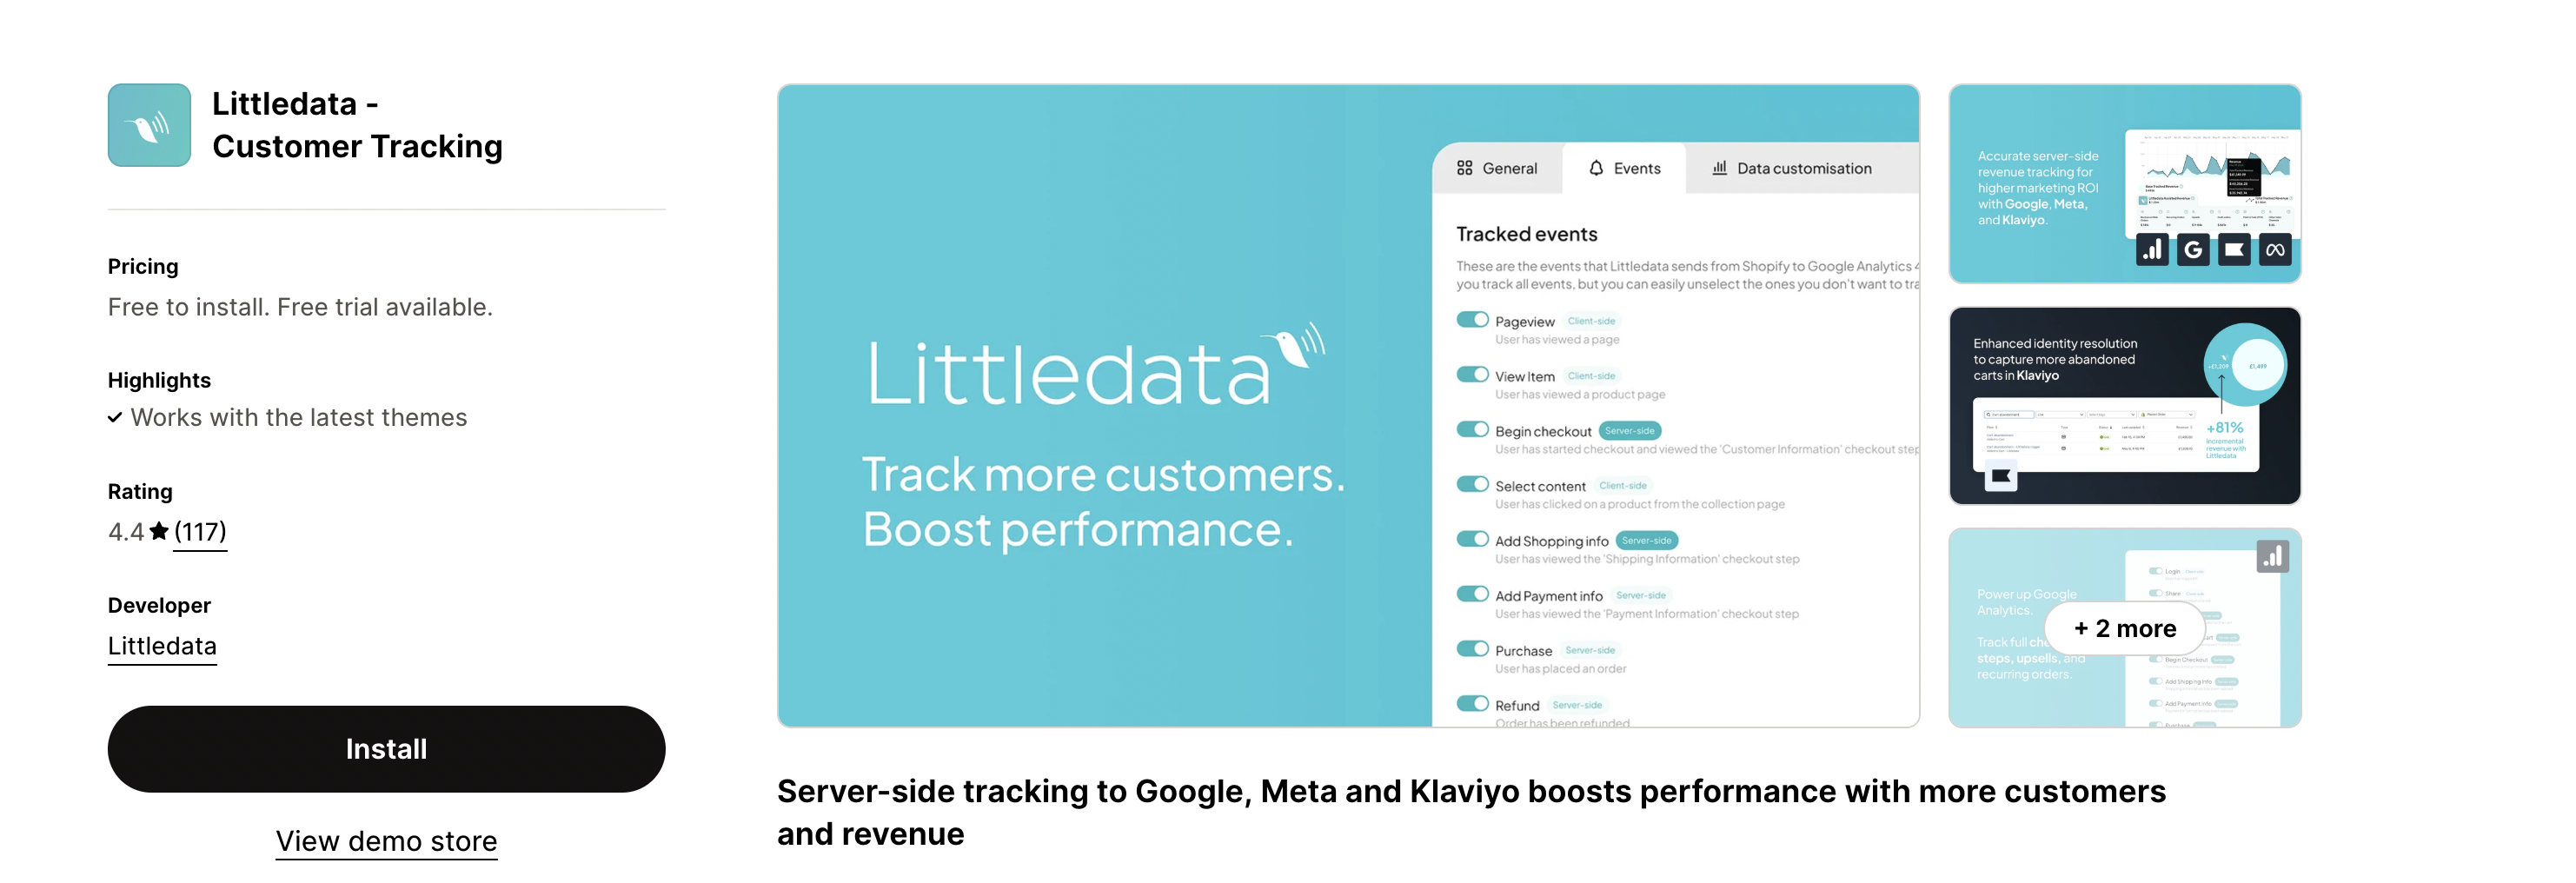
In this quick setup guide, we'll show you how to install Littledata - Customer Tracking, the most popular Shopify app for e-commerce tracking and marketing attribution in Google Analytics (GA).
Quick install guide
Step 1. Install Littledata - Customer Tracking app
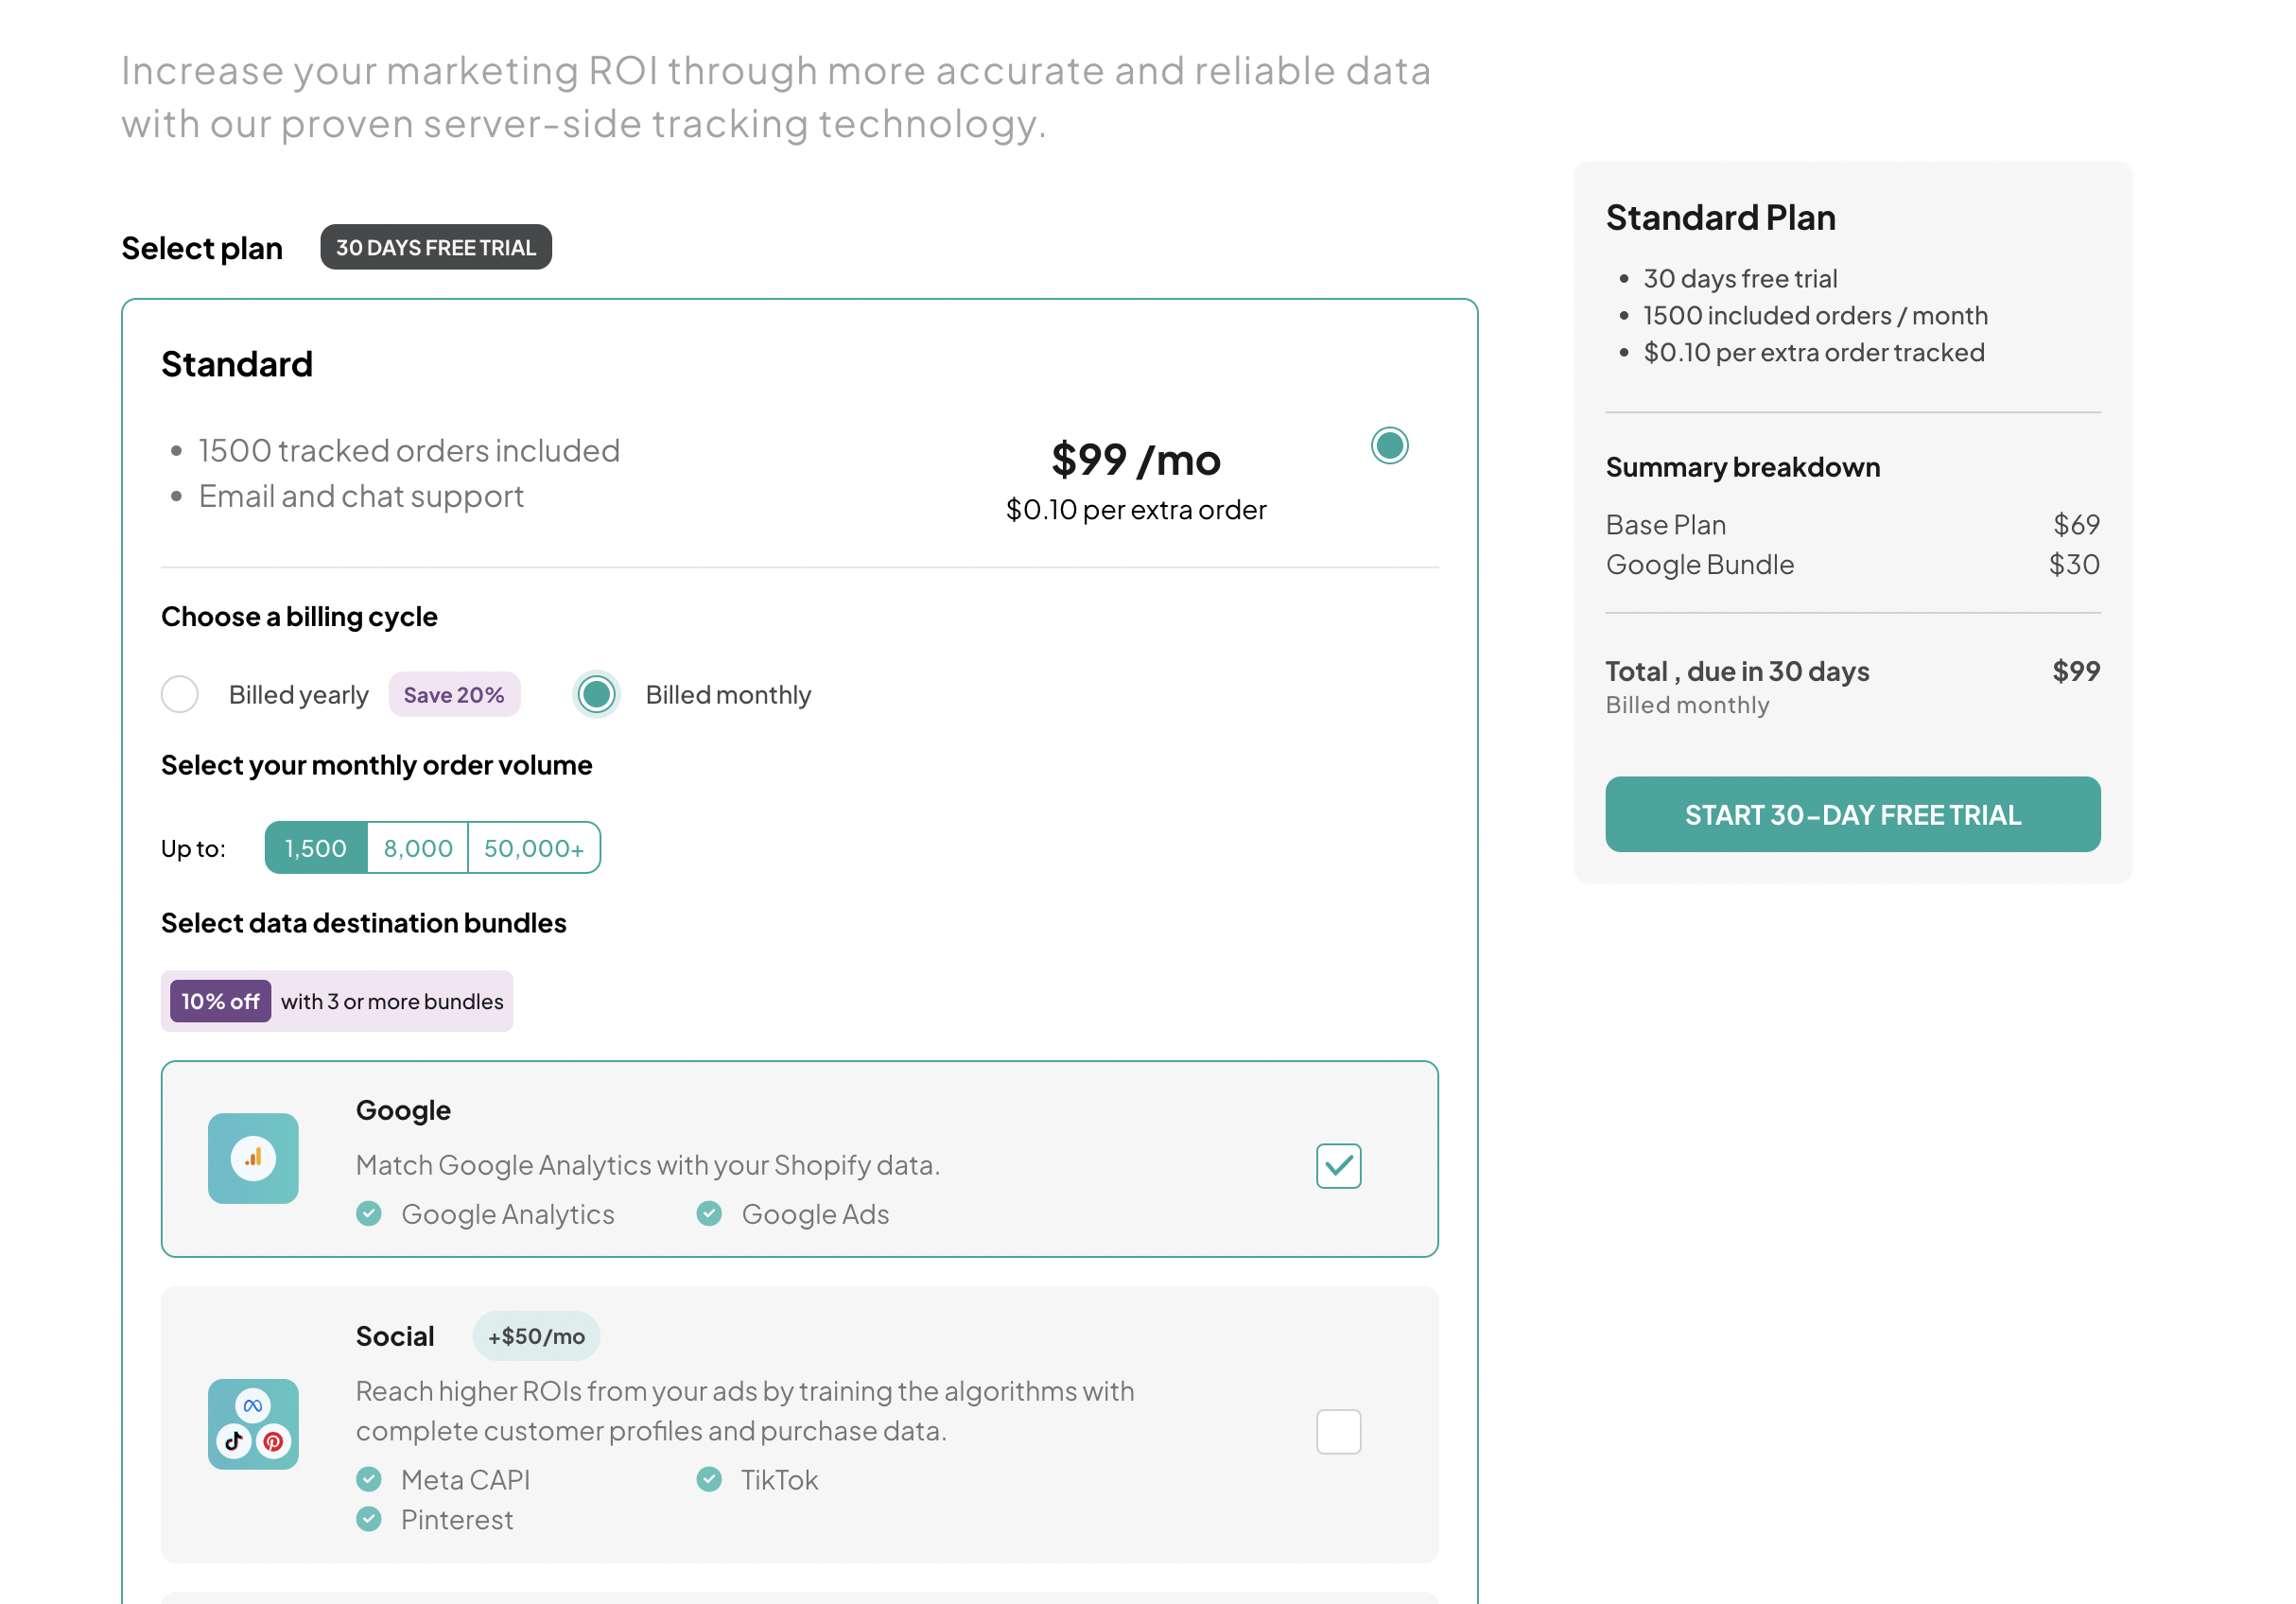
Step 2. Choose the Google connection bundle
Choose between Flex and Tiered plans, explore our pricing documentation to determine the optimal plan for your business requirements.
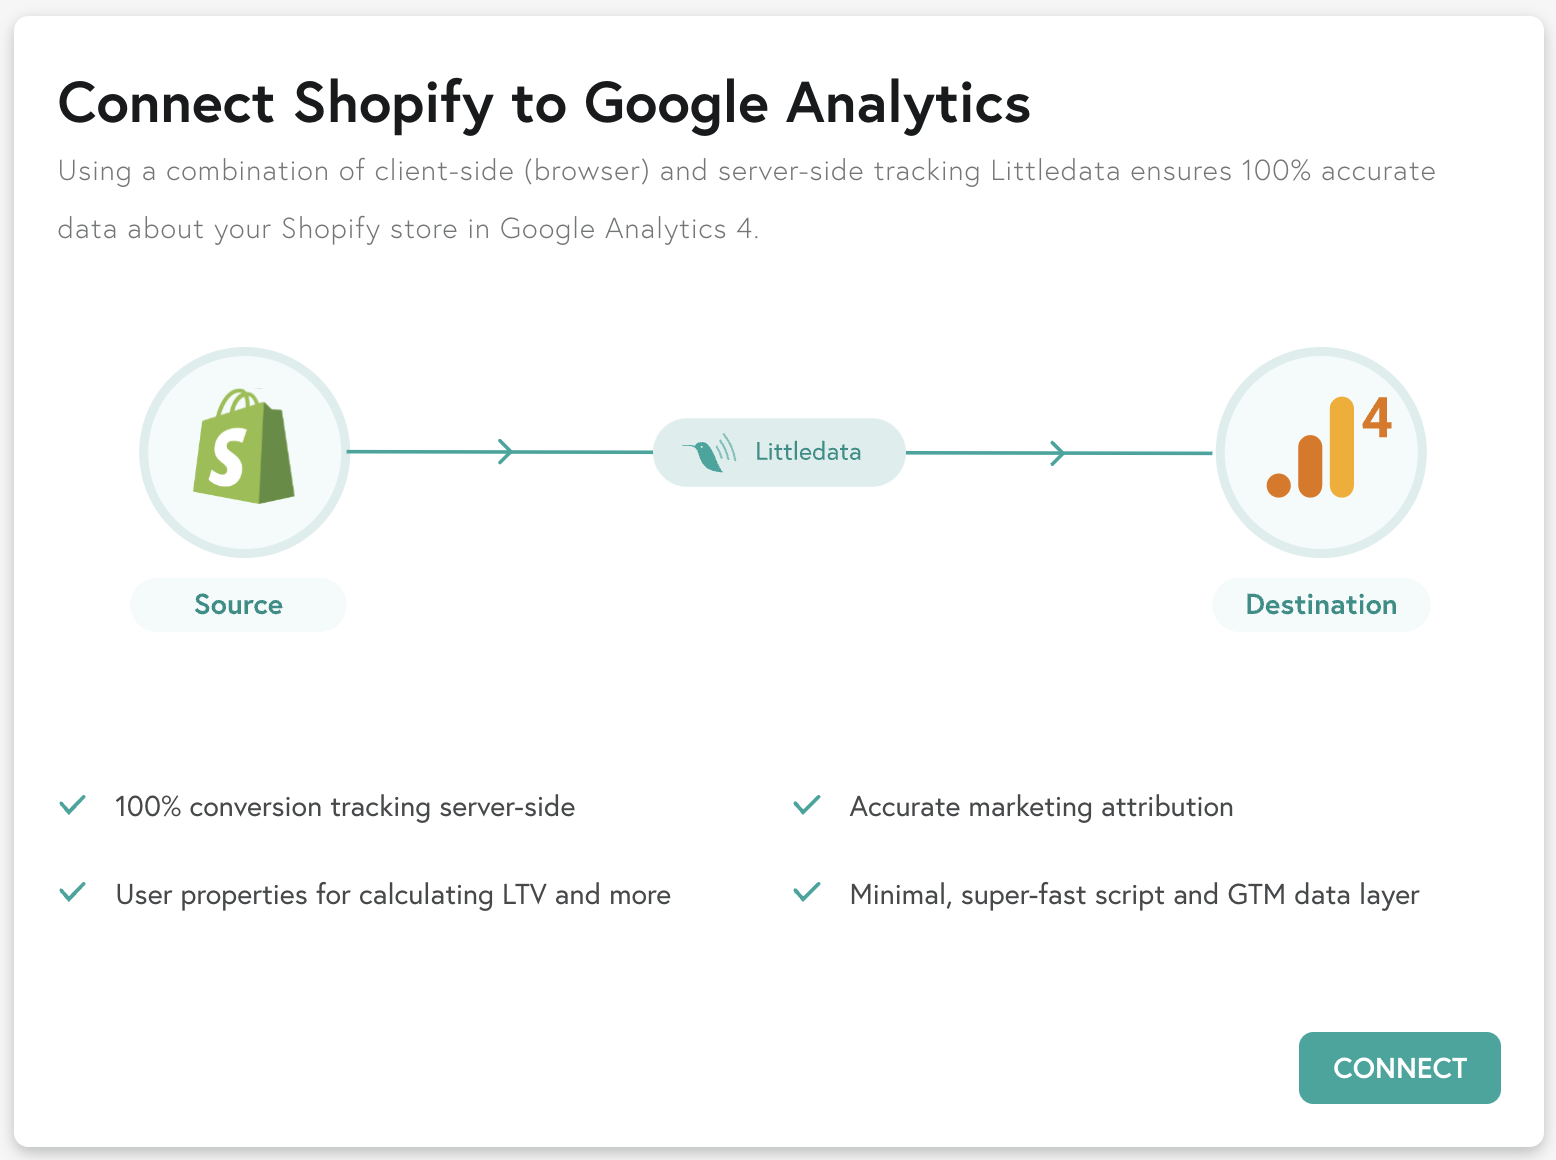
Step 3. Start the Shopify to Google Analytics connection
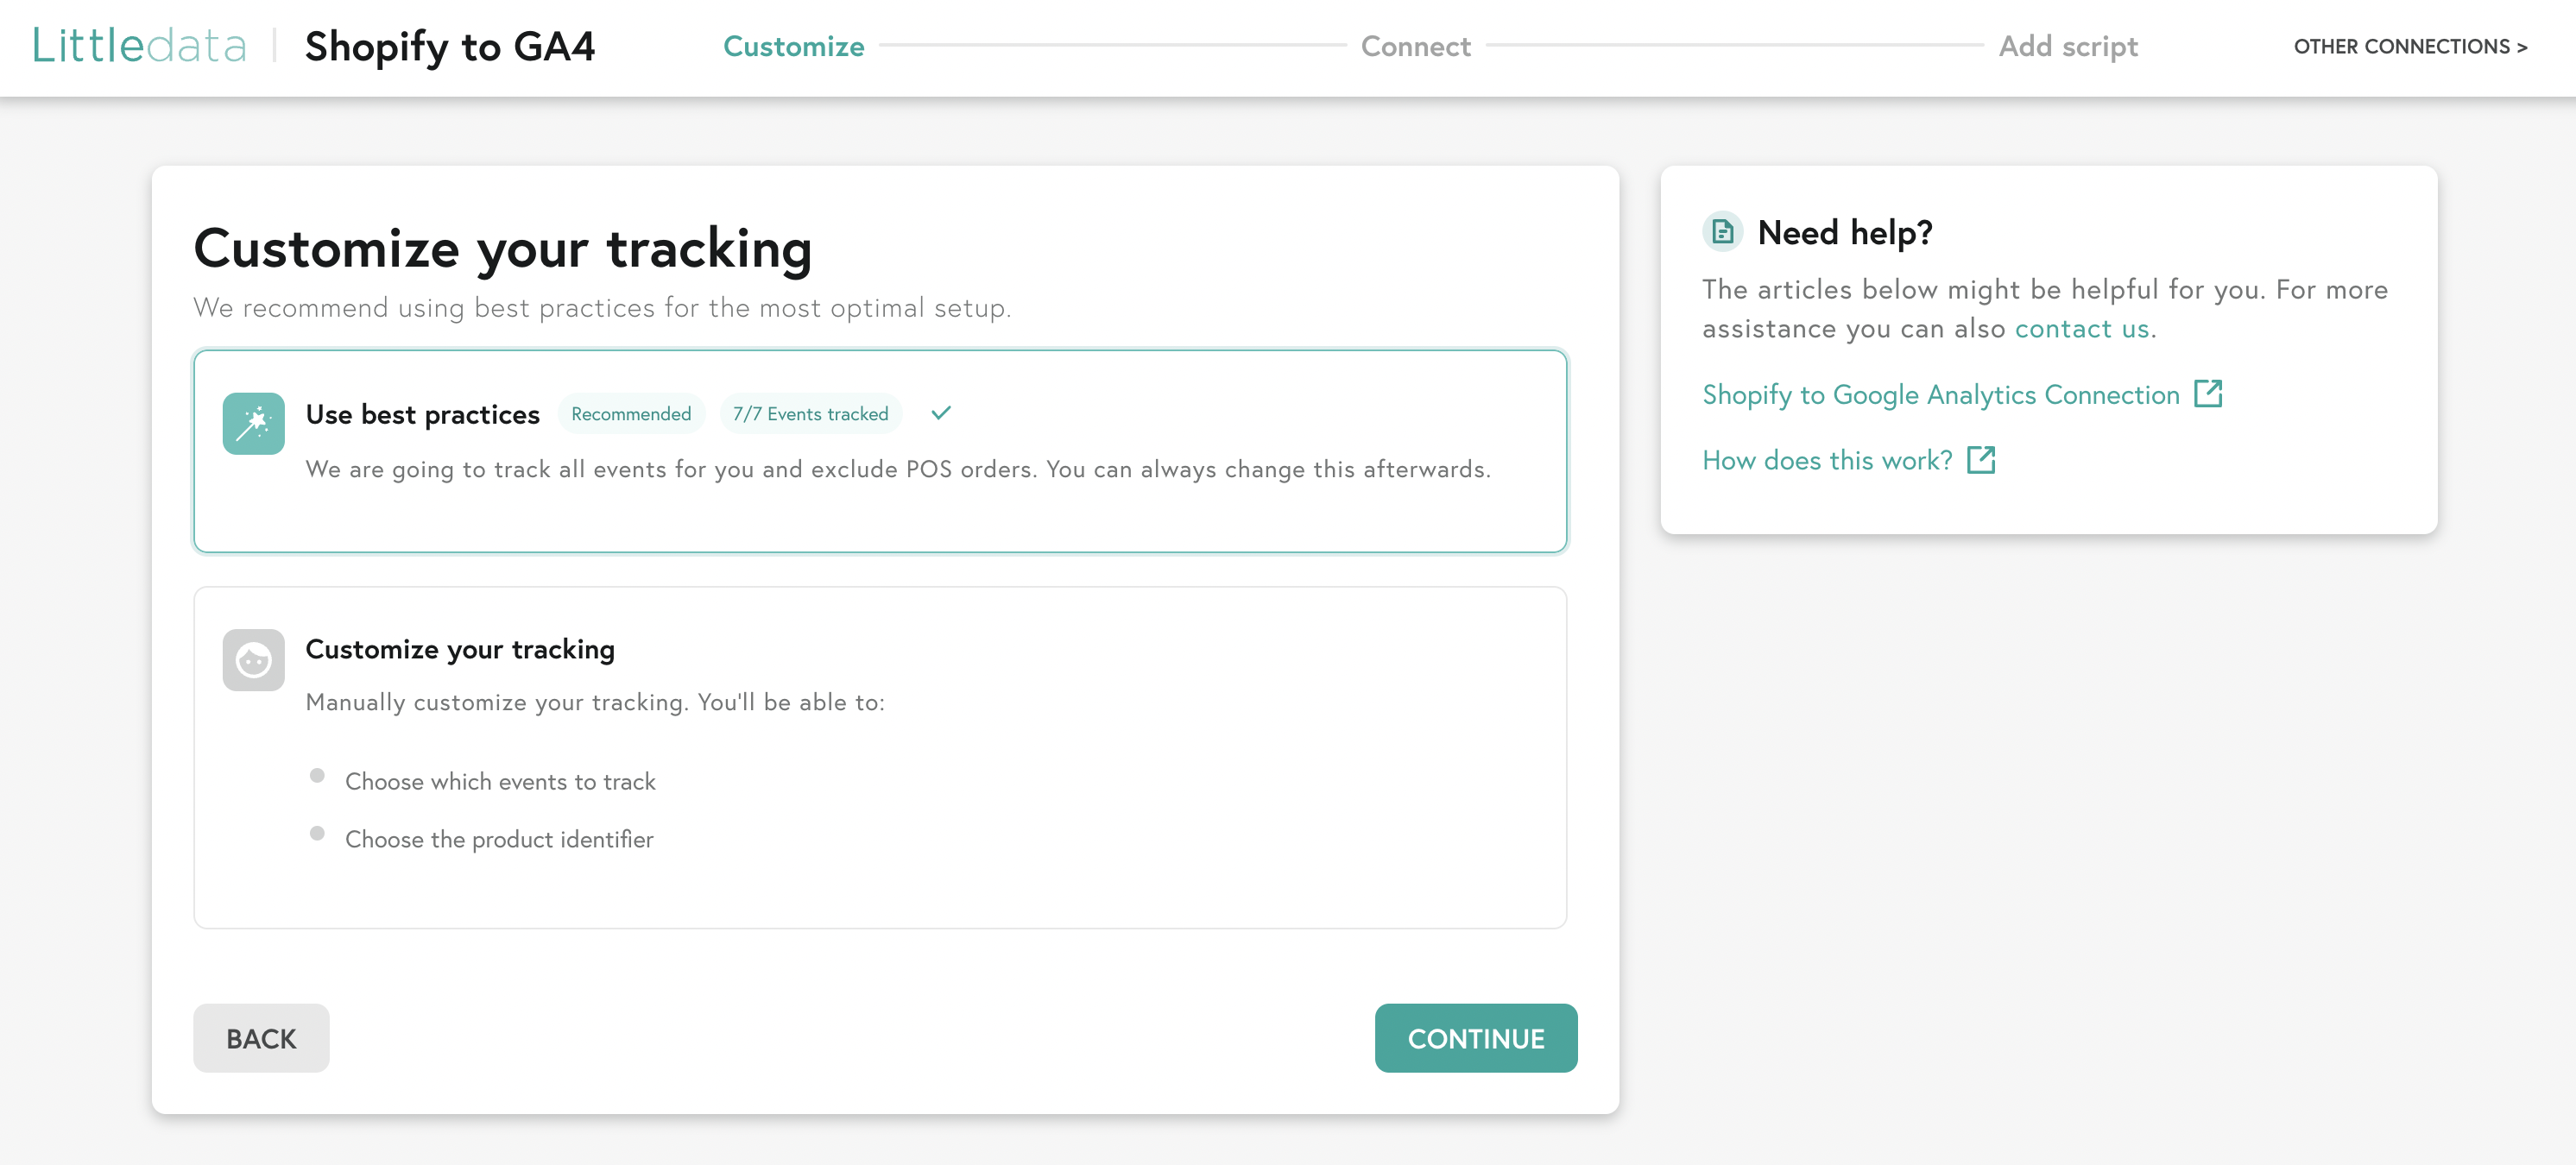
Step 4. Use best practices
We recommend using best practices for the most optimal setup. All data settings can be altered after the setup flow. See how to customize below.
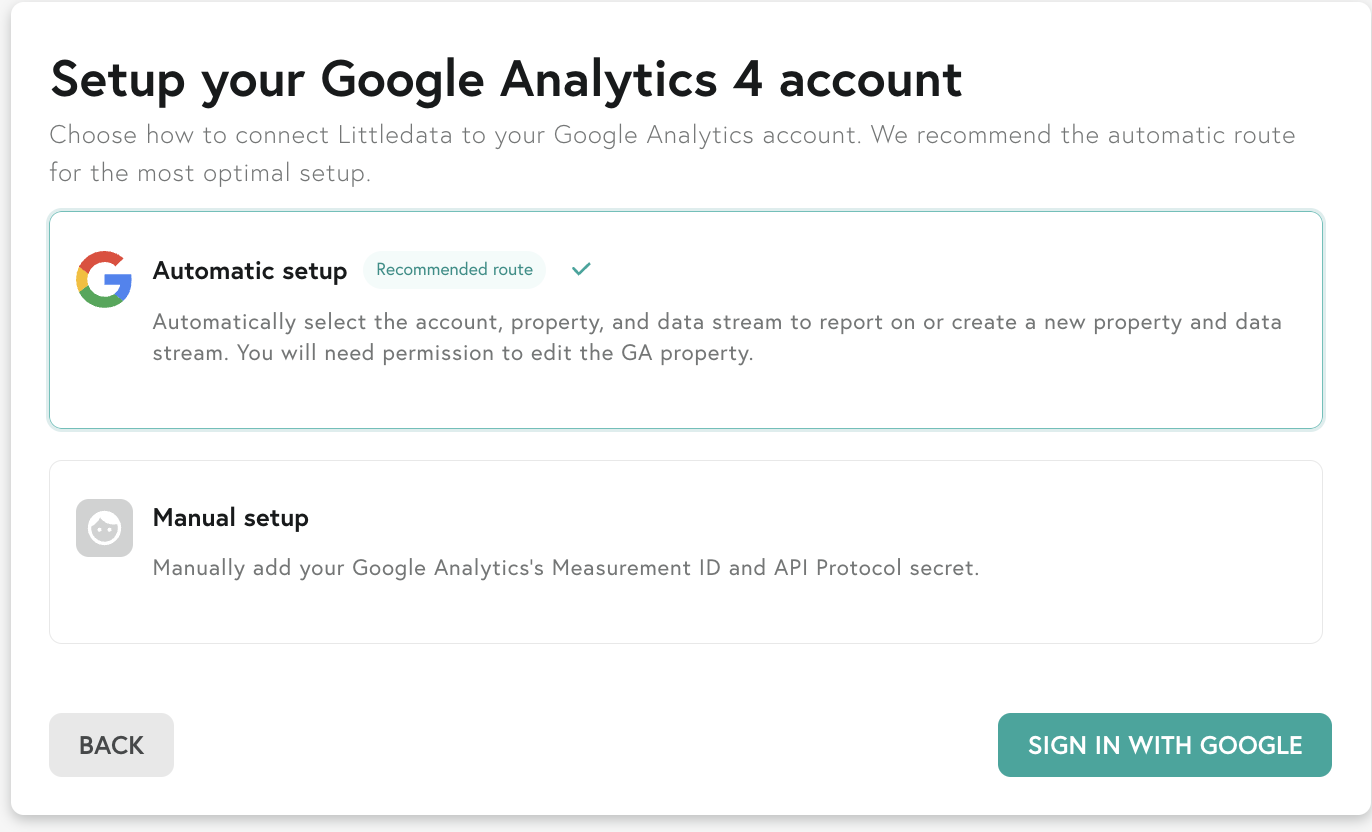
Step 5. Connect your Google Analytics account
You can choose how to connect Littledata to your Google Analytics account. We recommend the automatic route for the simplest setup.
Automatically select the account, property, and data stream to report on or create a new property and data stream. You will need permission to edit the GA property.
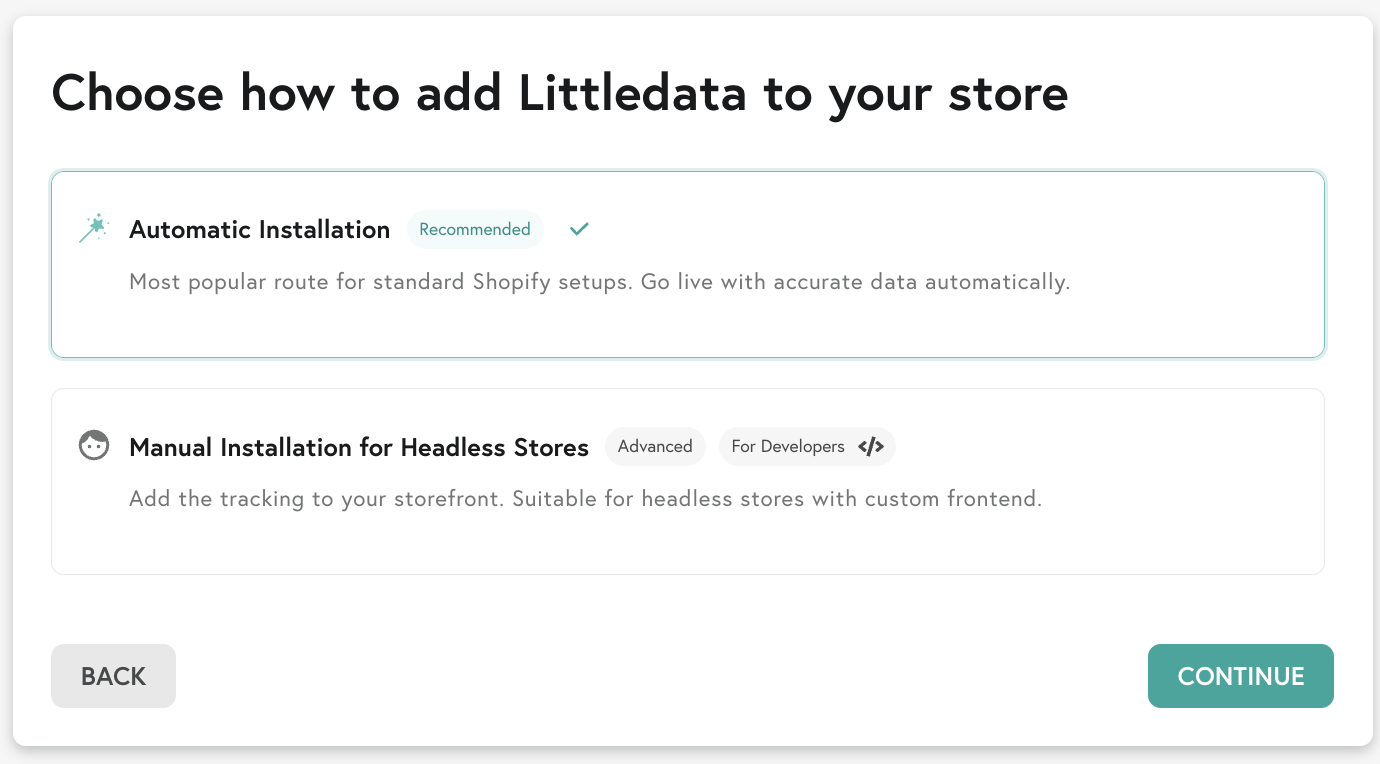
Step 6. Choose Automatic install
We recommend going the automatic route unless you have a headless storefront (see below).
Step 7. Disable the duplicate tracking
If you connected Littledata to the same GA4 property as your old tracking (e.g. Google Sales Channel) then the latter has to be removed to avoid duplicate tracking.
Confirm that duplicate tracking has been disabled and click on Continue.
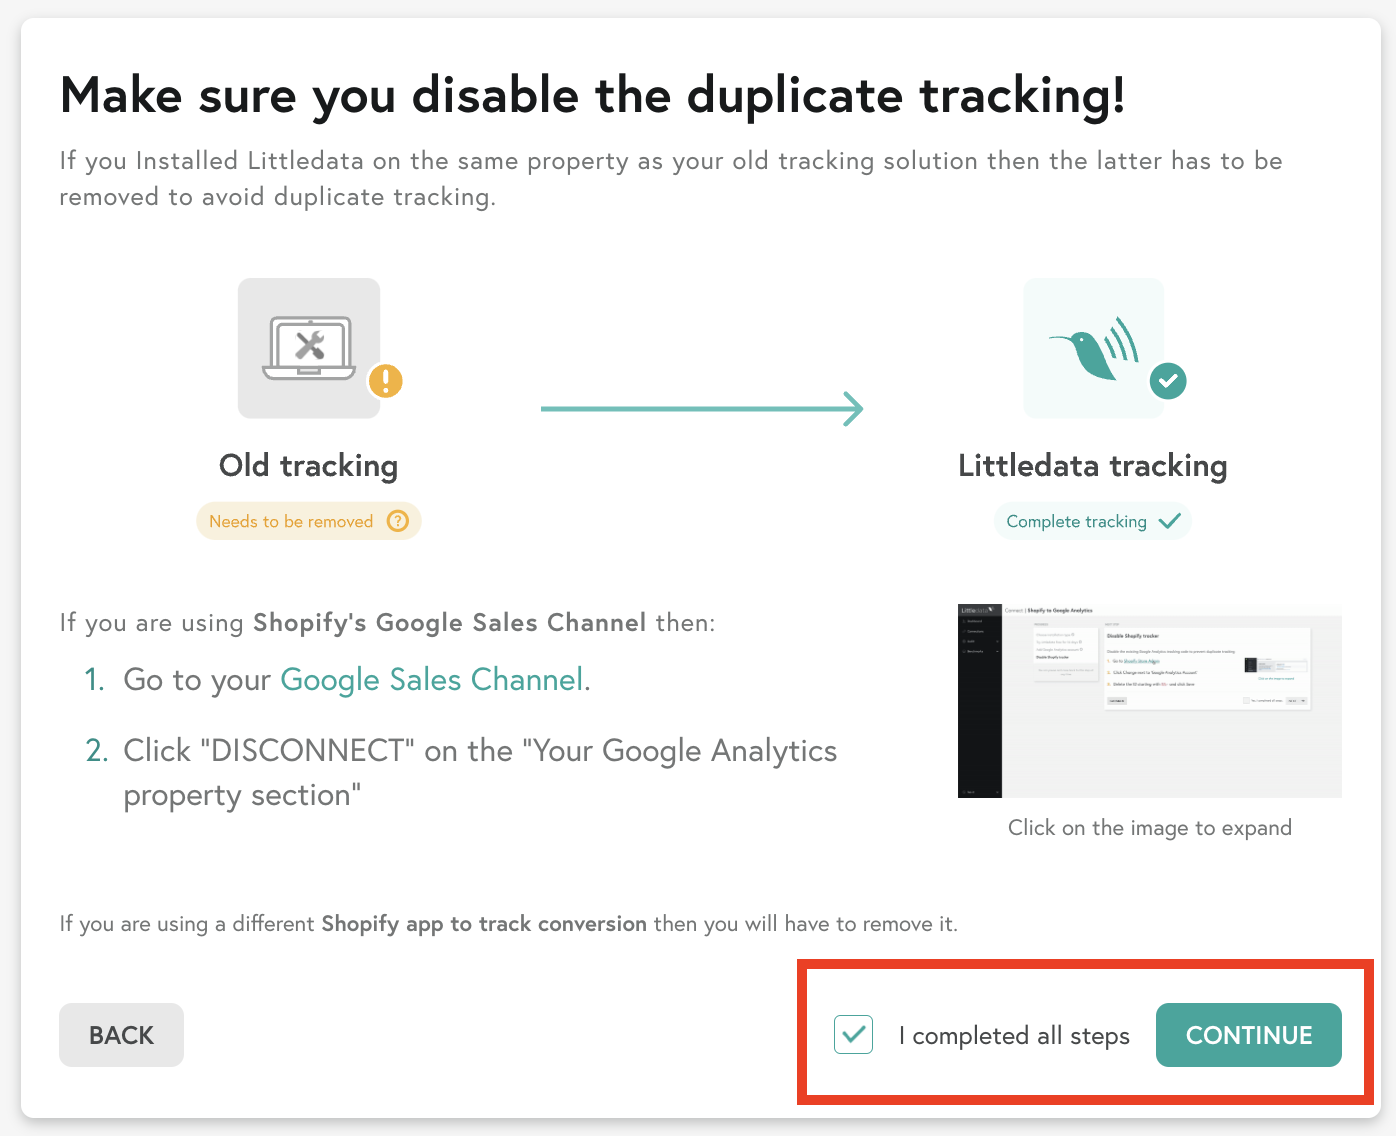
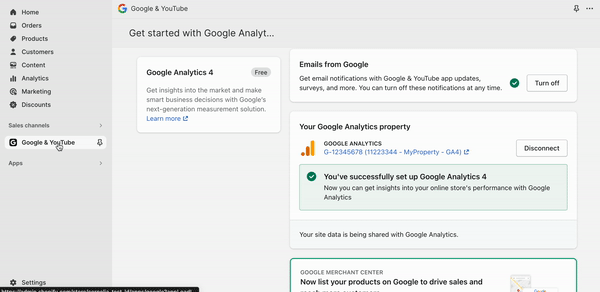
Here's how to find the native Shopify to Google Analytics connection. Go to Sales Channels > Google and Youtube > click Disconnect next to your GA4 property.
If you're not sure HOW your previous GA4 connection was setup, please read our step-by-step guide on how to fix duplicate tracking in GA4.
Step 8. Littledata adds the tracking script and webhooks
During the automatic installation process, Littledata adds a data layer, a tracking script and a set of webhooks to your Shopify store.
Installation complete
When the installation is successful, you will be redirected to the connection settings page.
Ready to get reporting? Try the GA4 video course our team has created
We invite you to complete our connection setup checklist. By doing so, you will gain a better understanding of our product's features and capabilities.
Customize your tracking
By choosing to manually customize your tracking, you will be able to select the events that you want to track and how the products appear in your Google Analytics.
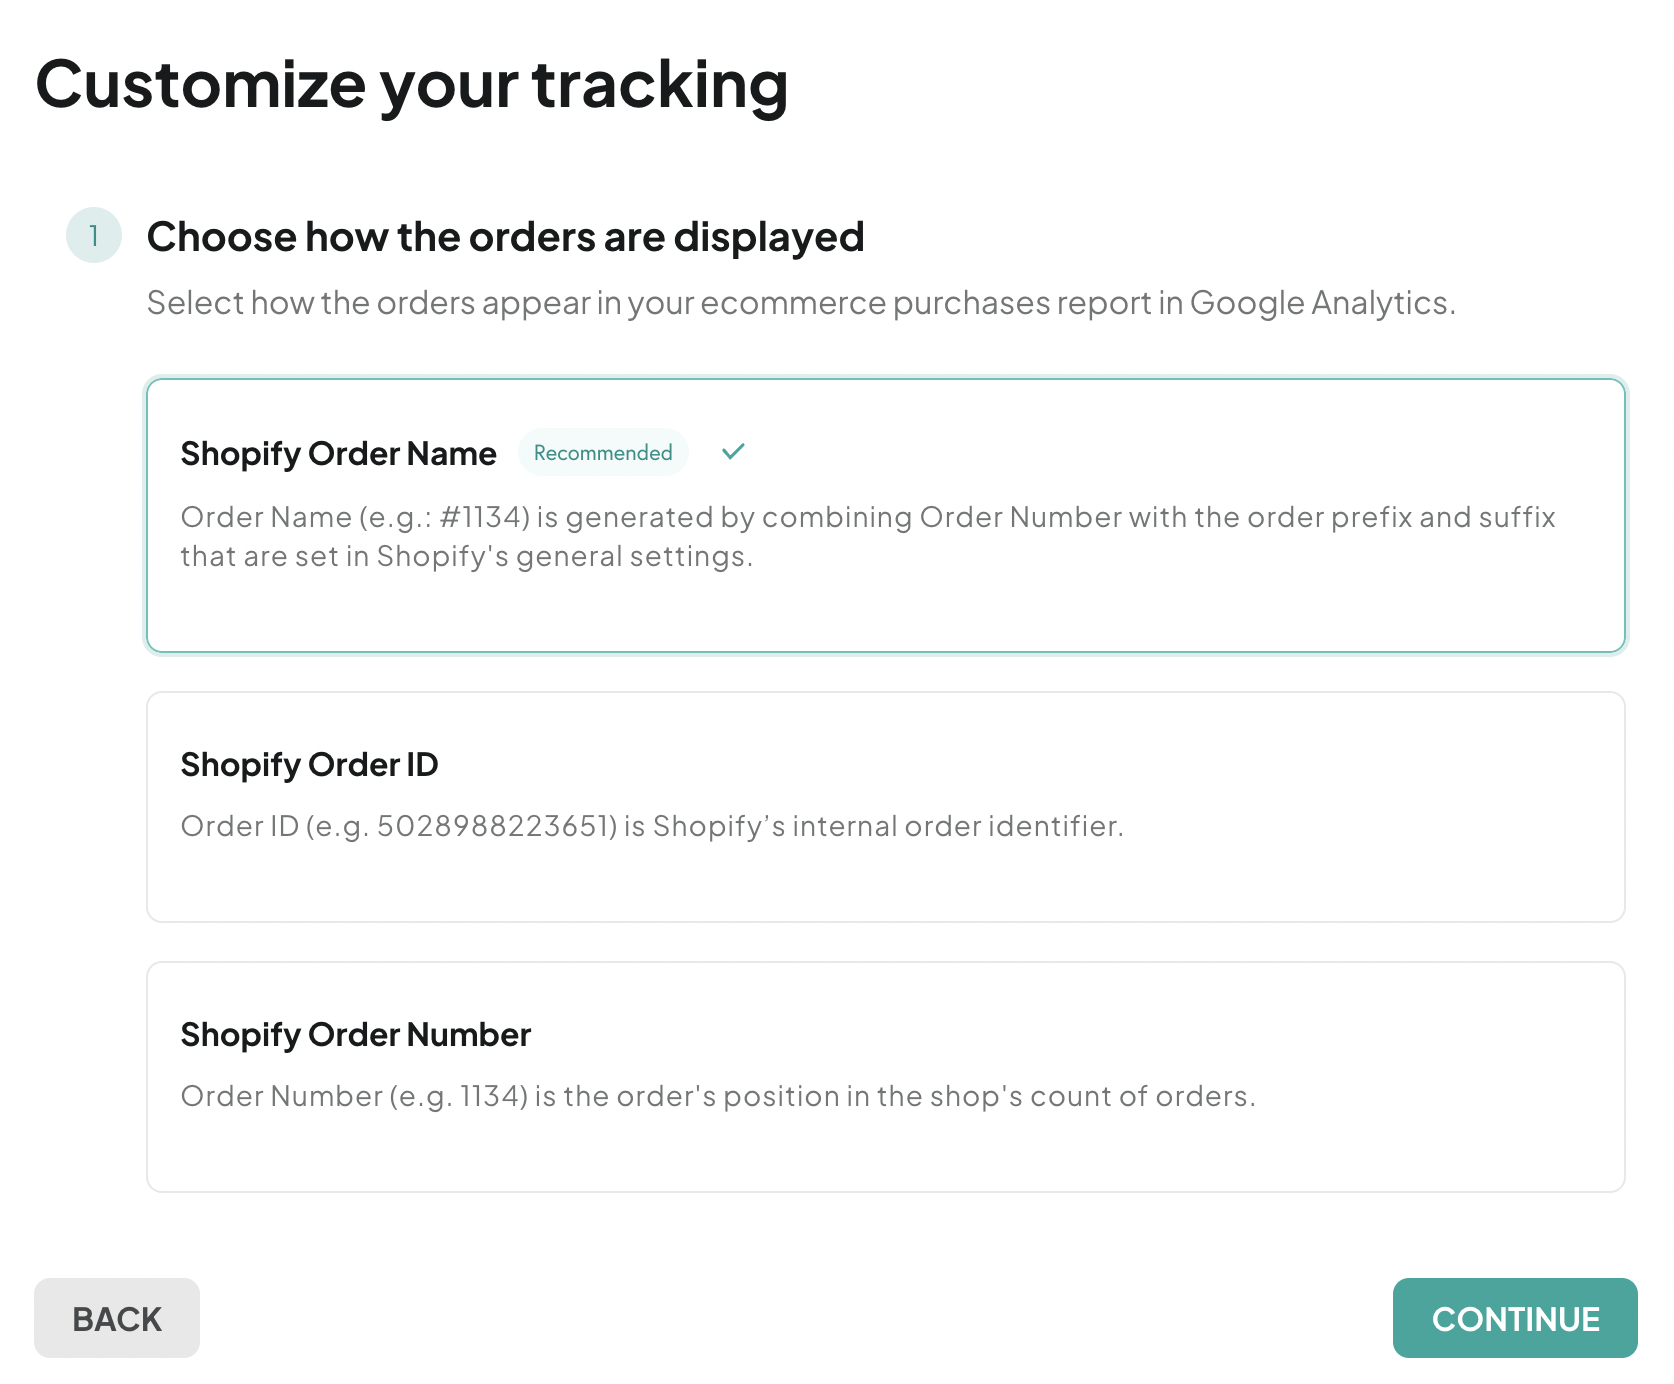
Order identifier
Choose how the orders appear in your ecommerce purchases report in Google Analytics. We recommend selecting the Shopify Product ID, but you can opt for Product Variant or Product SKU.
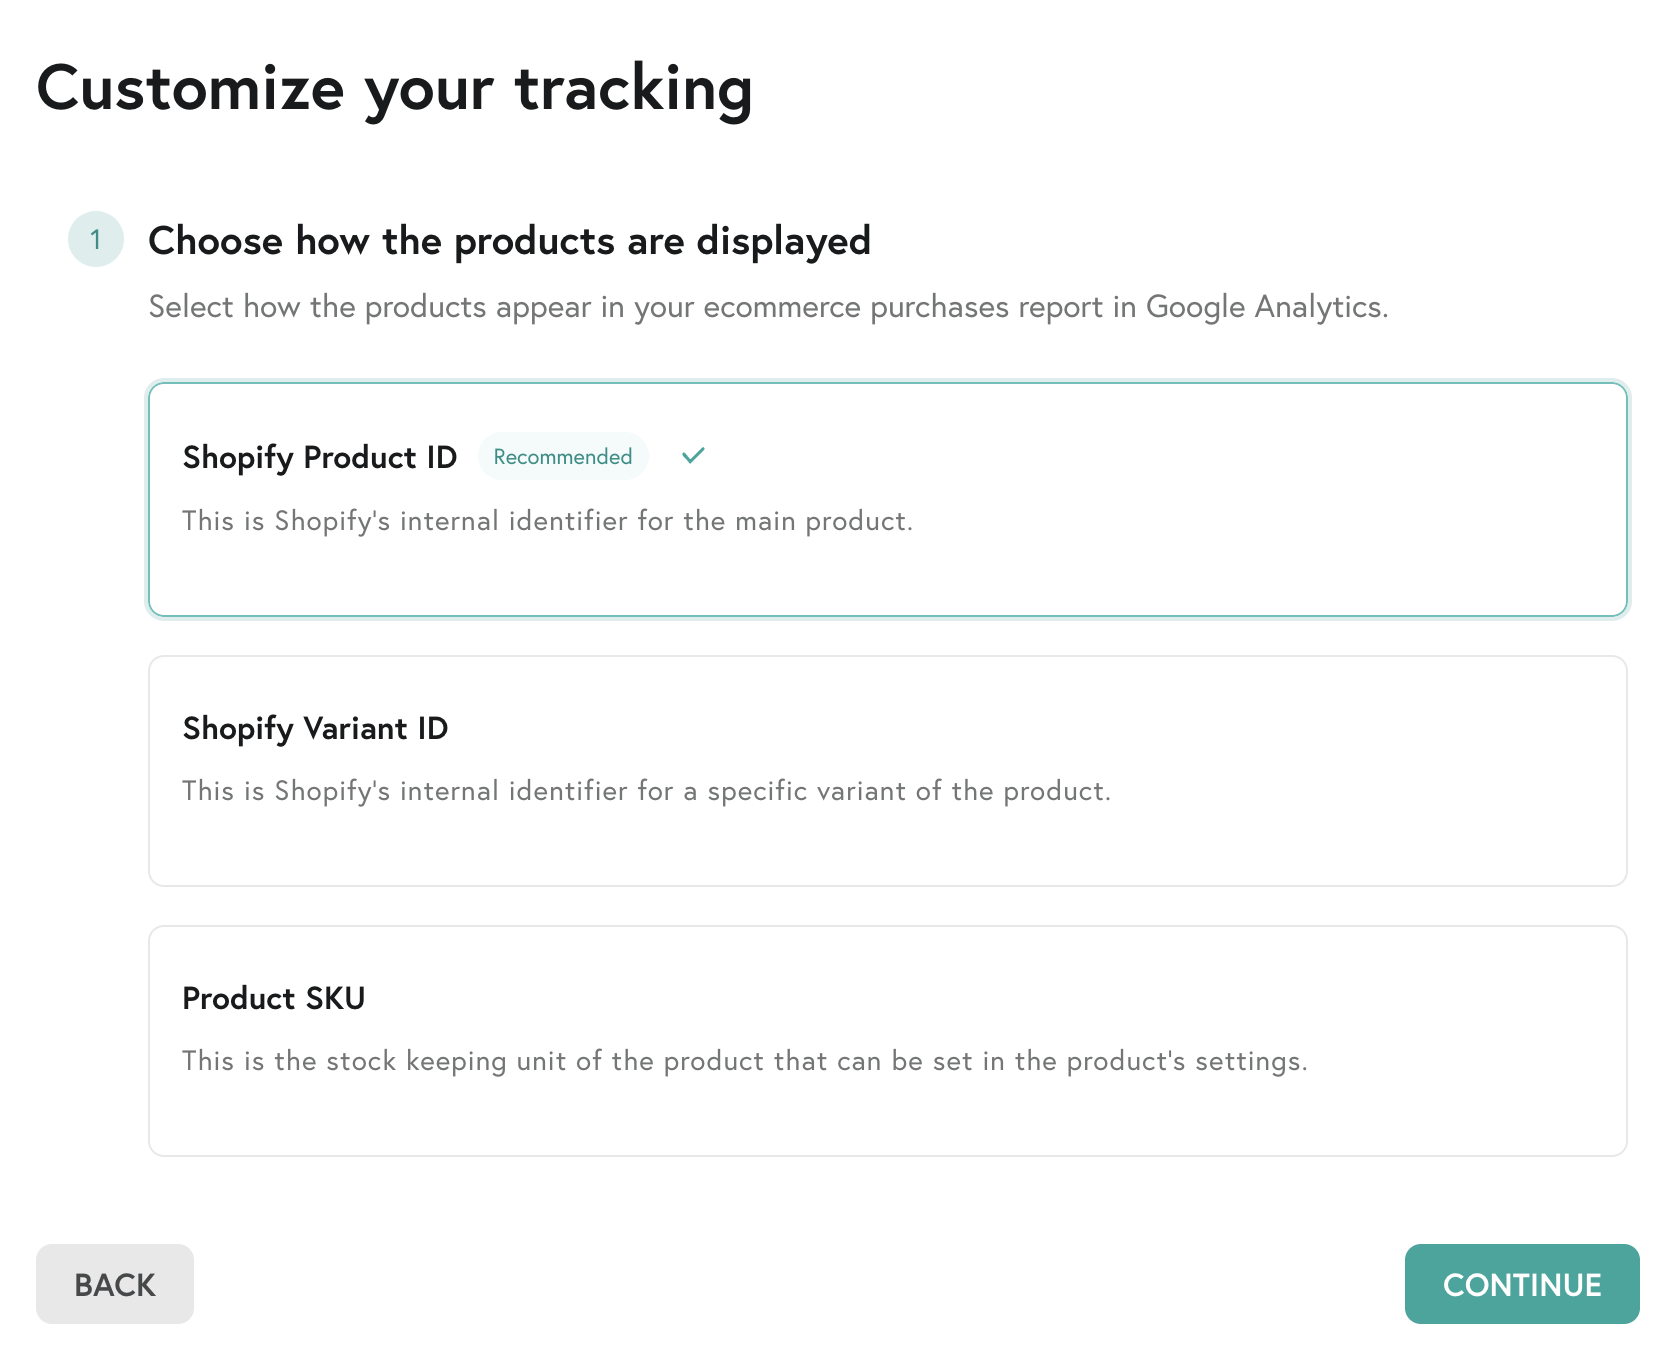
Product identifier
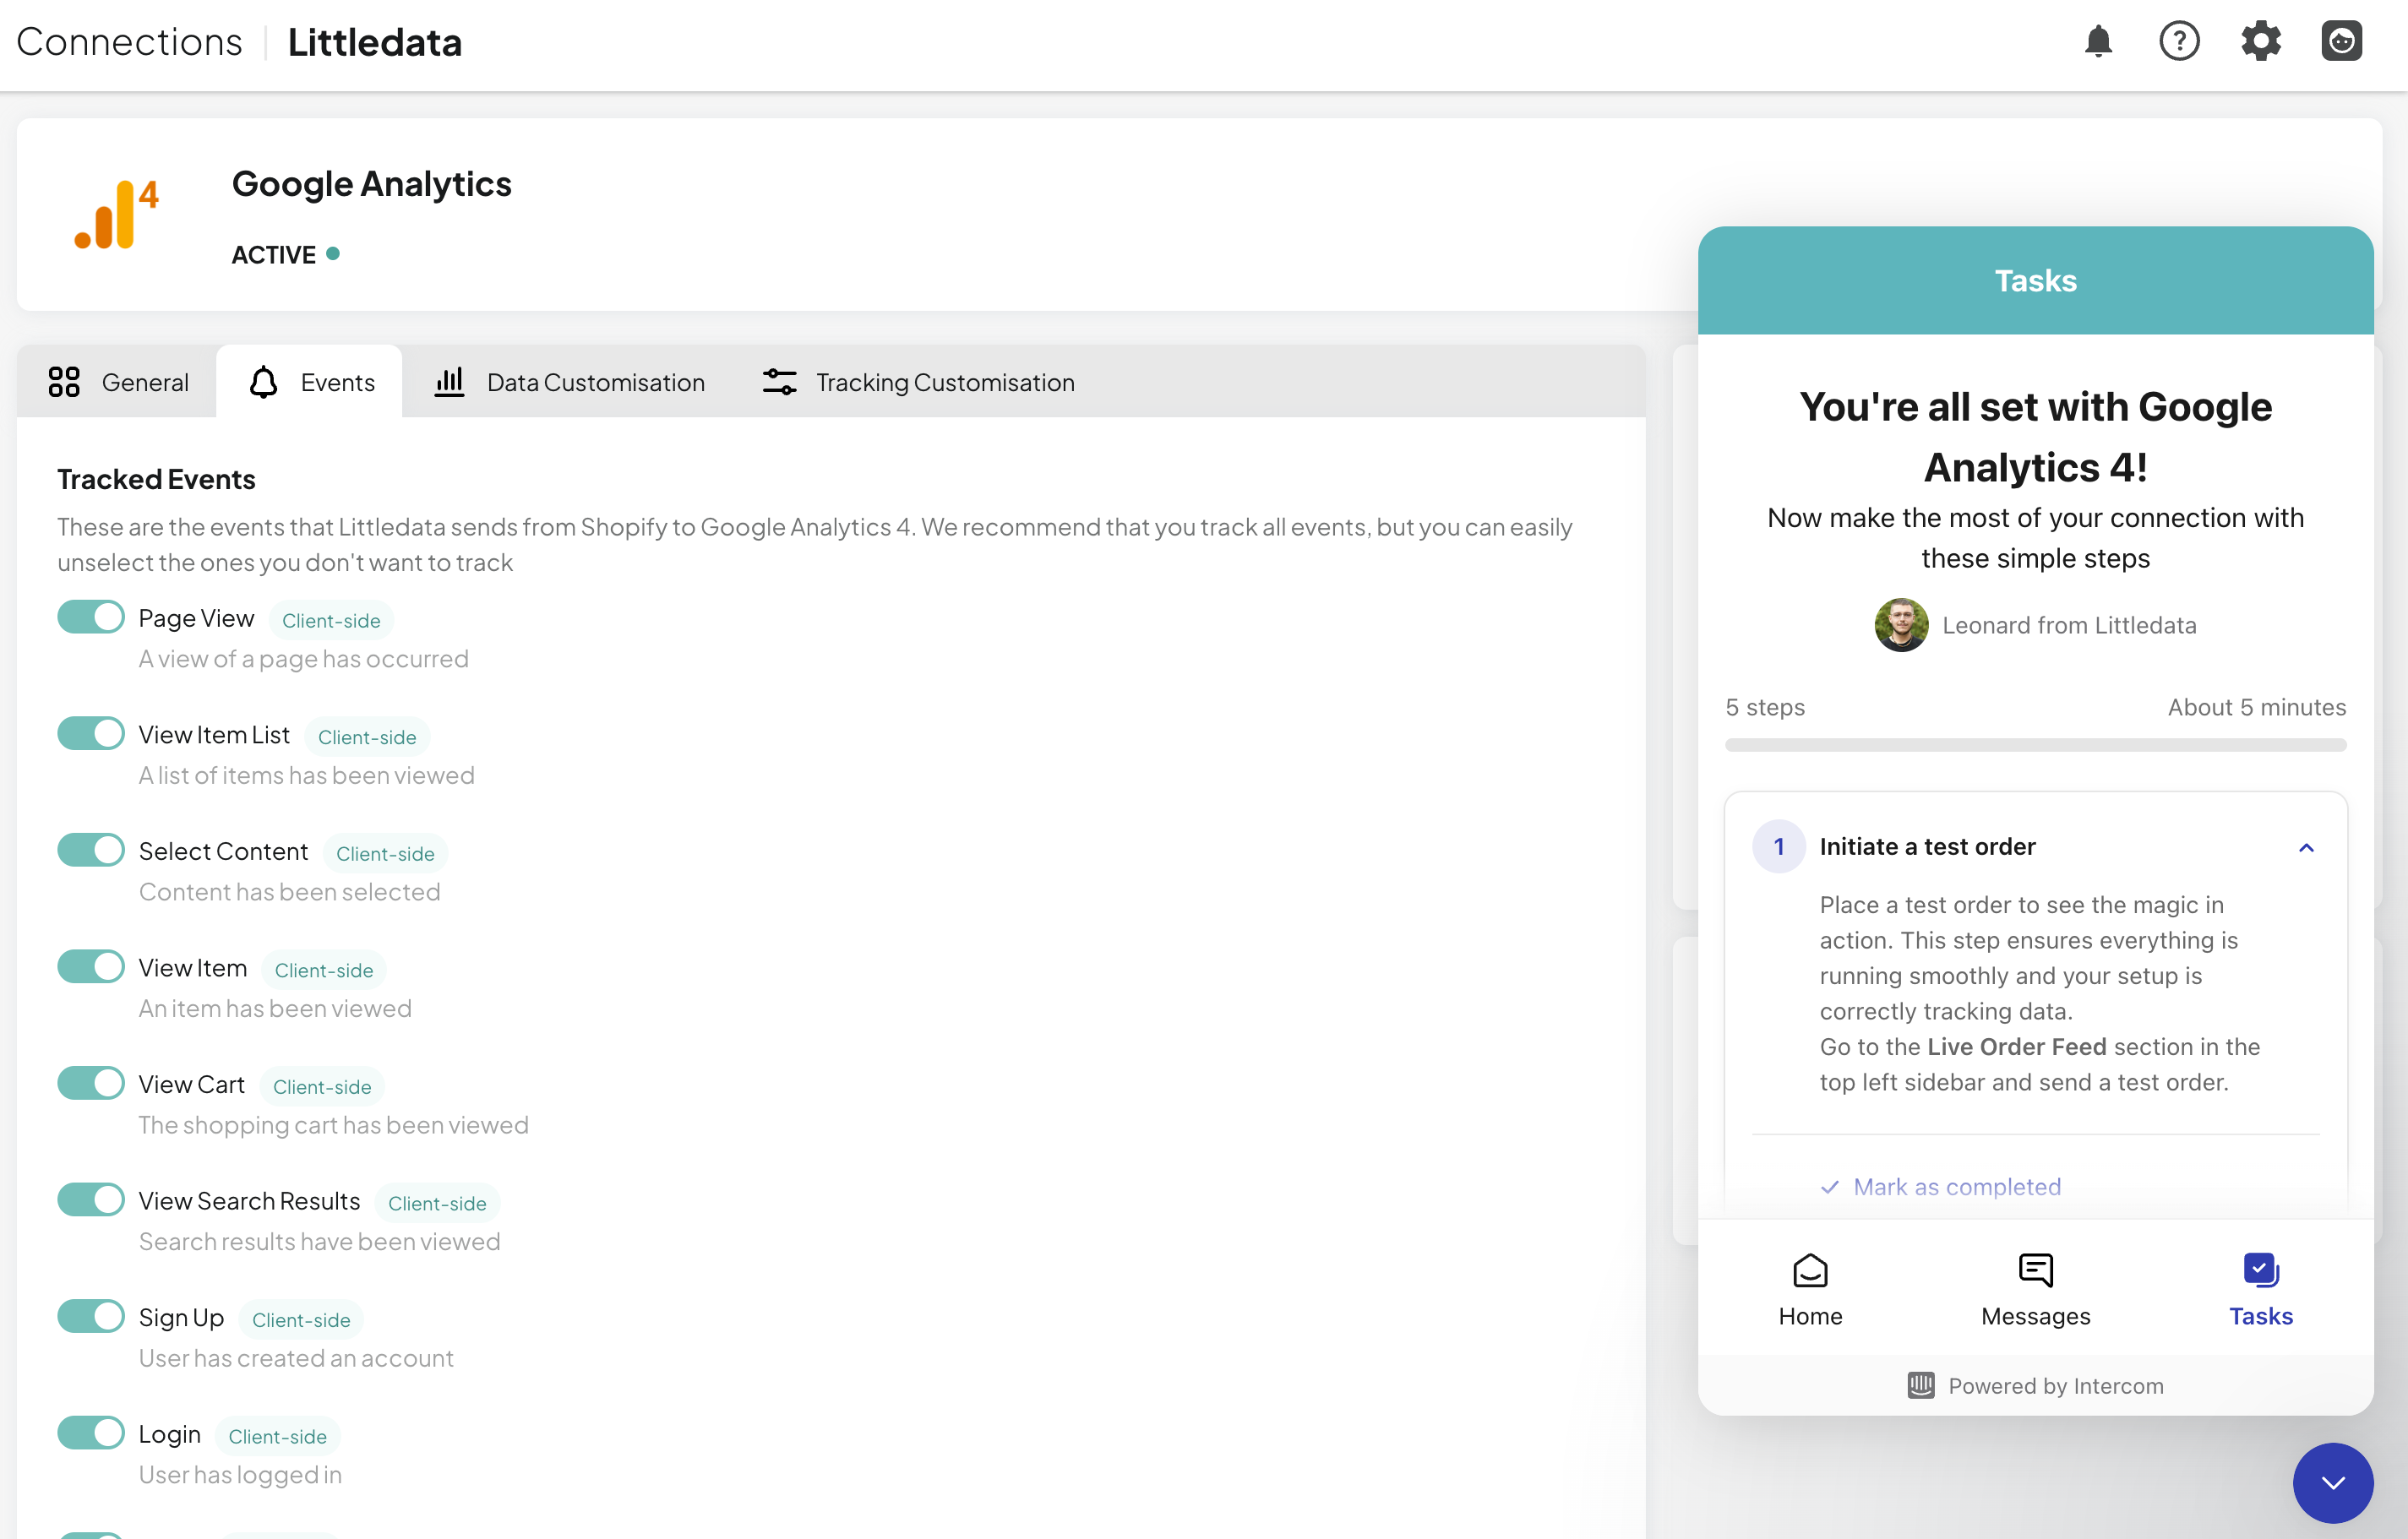
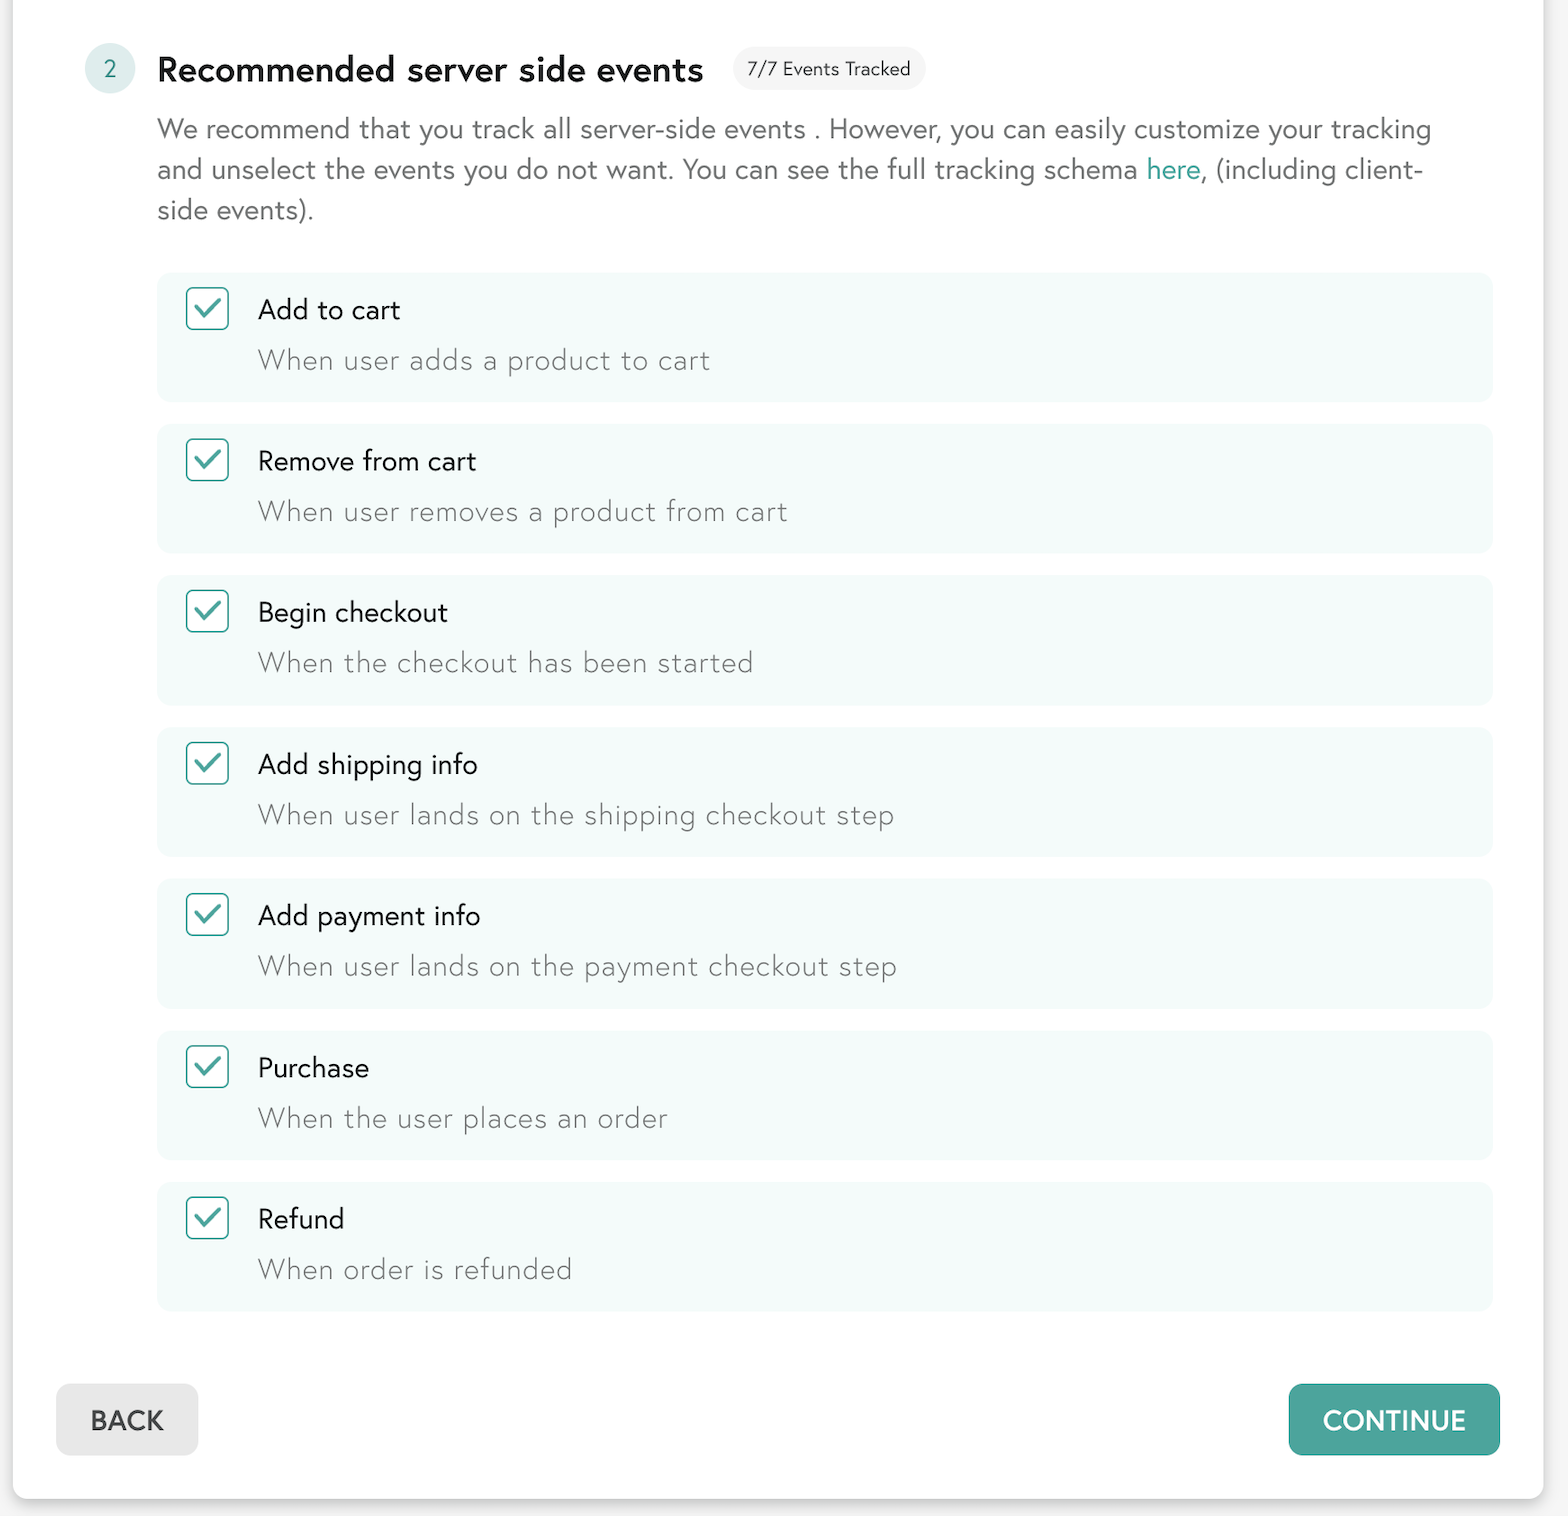
Choose events
We recommend tracking all events, but you can customize the server-side events that we track to your Google Analytics 4 property. You can always update this in the Data Pipeline Settings.
Setup for Shopify Hydrogen & headless stores
If you are using Shopify Hydrogen, or run a headless storefront, you will need to add the Advanced Tracking Script as part of the app setup.
See the Headless Shopify article for more details.